Staying Safe In Your Kitchen – Expert Tips To Protect You

While baking in the kitchen, make sure you keep safety first. Here are some expert tips to make sure your baking experience remains an enjoyable one!

Your kitchen might be the heart of the home, but it’s also a dangerous place. Sharp knives, boiling water, hot surfaces, and sizzling grease all add up to some major injuries, so it’s no wonder that many people end up in the emergency room every year due to kitchen incidents. With this in mind, here are some expert tips to ensure you stay well-protected from harm in your own cooking environment so you too don’t become a kitchen injury statistic.

1.Protect Your Skin

The first step to staying safe in your kitchen is to protect exposed skin from splashes and spills of hot foods, liquids, and fats. Whether you’re cooking at the hob, pouring boiling water into or out of a pan, or serving up fried dishes, you’ll find that the risk of burns is surprisingly high. You can protect yourself best by wearing a professional chef’s apron or chef’s jacket that covers your body, arms and exposed skin, keeping them safe from harm. If you’re wondering where to buy high-quality chef’s attire for you to wear at home you should check out professional specialists like ChefWorks. You’ll find protective clothing made from the best quality fabrics and designed to withstand the rigors of even a professional kitchen.

2.Clean Up Rapidly

If you’re making a meal while dealing with other things, it’s all too easy to spill some food, splash some water or drop some fat. If this happens, it’s important to clean up quickly as this will help to guard against any accidents. Even small amounts of food or water can create a slipping or tripping hazard, and oil and grease are particularly dangerous.

3. Keep A Fire Extinguisher To Hand

Your fire extinguisher represents your kitchen’s most vital gadget. Nobody expects their kitchen to go up in flames, but on the off chance that it does, you should have a fire extinguisher within easy reach and know how to use it properly so that you can stay safe in an emergency/

4. Be Wary Of Steam

Over 100,000 people every year have to go to the ER because of steam burns. Boiling water, hot beverages, and faucets that supply hot water on demand are all scald risks, and steam burns are extremely dangerous, often being more severe than burns from boiling water itself. If you’re taking the plastic wrap off a microwaved dish, taking a lid off a pot of boiling water or tearing open a steamable packet, you are at risk of steam burns, so take care and ensure your little ones also understand that this is a potential hazard.

5. Stay Hygienic

There are more bacteria in your kitchen than in any of the other rooms in your home, so remember to maintain a good level of hygiene. You can banish bacteria by cleaning your kitchen using a water and bleach solution on a regular basis. Clean your cutting boards with an anti-bacterial spray after each use, wet your sponges after each use then zap it in your microwave for 2 minutes. Change and wash your dish clothes regularly.

If you follow these top tips, your kitchen will be a very safe and hygienic place where you and your loved ones will be happy and healthy.

Classic Gingerbread Cookie Recipe – Easy No-fail Recipe!

Christmas is just around the corner, and one of my favorite holiday recipes is making its debut once again! This gingerbread cookie recipe was long lost on our blog and mistakenly deleted years ago! One of our regular readers wrote to us and managed to track down our recipe that was re-posted on another blog. Now we are back with the original recipe that is tried and tested, and looks like it is a favorite among many of our readers. If you are looking for the perfect gingerbread recipe that is simple, easy, and no-fuss – this is it! Keep reading and happy baking!

Classic Gingerbread Cookie Recipe with Icing! – Easy No-fail Recipe!

 
Ingredients:
 
  •  Melted butter, to grease
  •  125g butter, room temp
  •  1/2 cup brown sugar
  •  1/2 cup golden syrup
  •  1 egg, separated
  •  2 1/2 cups plain flour
  •  1 tbsp ground ginger
  •  1 tsp mixed spice
  •  1 tsp baking soda
  •   Plain flour, to dust
  •   1 cup pure icing sugar, sifted
  •   liquid food coloring
Instructions:
 
  1. Preheat oven to 180C and lightly grease 2 baking trays with melted butter.
  2. In a mixing bowl using an electric mixer, beat butter and sugar until pale and creamy. Slowly add in golden syrup and only the egg yolk, and keep beating until well incorporated.
  3. Stir in flour, ginger, mixed spice and baking soda.
  4. Turn dough out onto a lightly floured surface and knead until dough is smooth. Press dough into a disc shape and cover with plastic wrap. Place dough in fridge to cool for 30 minutes. Cool dough will help your gingerbread shapes hold their form until they are placed in the oven to bake.
  5. To make icing, using a mixing bowl and electric mixer, beat egg white until soft peaks for. Gradually add icing sugar and beat until stiff peaks form.
  6. Divide icing among as many bowls as the number of color you plan on using to decorate your cookies. Add a few drops of food coloring to each icing to get your desired color. Place the bowls in the fridge.
  7. Place dough between 2 sheets of baking paper and roll out until about 4mm thick. Use your cookie cutters to cut out shapes. Place the shapes on baking trays about 3 cm apart.
  8. Bake cookies for 10 minutes or until slightly golden/brown. Remove and transfer to a rack to cool. You can also place them in the fridge to cool off faster!
  9. Place prepared icing in small plastic bags and cut a small hole in the corner of each bag. Pipe icing over cookie to decorate as you wish!

Seven Things To Improve Your Baking

Baking isn’t just an art – it’s a science. It’s about the ingredients’ physical properties, chemical reactions, measuring techniques and procedure!

Anyone can bake if they have a good recipe and follow its instructions to the letter. However, how would you like to take your baking to a whole new level of excellence? Here are seven things that will make a better baker.

Preparing To Bake

Firstly, before you roll up your sleeves and turn on the oven, it’s important to be well-prepared for baking. Make sure your surfaces are clear and clean, ready to cook. Make sure you’ve washed your hands and ensure you’ve put on an apron ready to catch any spills and splashes that could ruin your clothes. Although you could choose a half apron, a full coverage one is often the best idea to make sure that you are fully protected from marks and stains. You can find more apron styles here to choose from. Once you’re ready to begin, it’s time to stock up your pantry with these secret enhancing ingredients that will boost the flavor of your cakes, pastries, and puddings significantly.

Instant Espresso Powder

Don’t confuse espresso powder with grin coffee – instant powder is mixed directly with boiling water to make an intense and immediate cup of java. It’s not only great for making a tasty cup of speedy coffee, but it’s also great for making chocolate dishes even more chocolatey. If you’re not a coffee fan, don’t worry, a pinch or two won’t make your dessert taste of coffee, but it will make the flavor more complex and potent.

Lemon

Just a touch of lemon works wonders for fruit flavors, intensifying its fruitiness and balancing any fruit which is just too sweet for a rounder flavor. Try lemon zest for your pie filling, juice for jams and paste for fillings, frostings and cake batter.

Nutmeg

You may be used to adding nutmeg to your cookies at Christmas time, however, this subtle spice works incredibly well in savory dishes too. It can enhance cream-based sauces like mornay and bechamel, and you should definitely try it in mac and cheese.

Cinnamon

If you’re making a caramel dessert, cinnamon will enhance its flavor even more. Don’t add too much though – just a small pinch will usually be enough to make your puddings and cakes taste amazing.

Almond extract

Are you making a coffee cake or coffee-flavor ice cream? Then try adding a touch of almond extract. A quarter teaspoon is enough to add some extra sparkle to your dessert and will bring even more depth of flavor.

White Pepper

If you’re making any baked goods that are flavored with spice, molasses or ginger, add a touch of white paper. A few grinds will add even more depth to the spice, along with floral notes that will take your cake or cookies to a whole new level. Try these secret pantry ingredients the next time you bake and you’re sure to be amazed by the way their flavors lift your baking to a whole new level of excellence!

How to Make the Perfect Coffee Crunch Cake

Any San Franciscan will sigh about the highly beloved but sadly departed, Coffee Crunch Cake when asked about dessert! Well, we say “departed” since the original coffee crunch cake people — Blum’s Bakery in San Francisco and Ernest Weil, the original baker who developed the recipe for this delicious cake in the 1940s — are long gone. But what was so legendary about it?

Let us correct you, it still is legendary and it’s because of the classic twin stars:

  1. Coffee
  2. Contrast

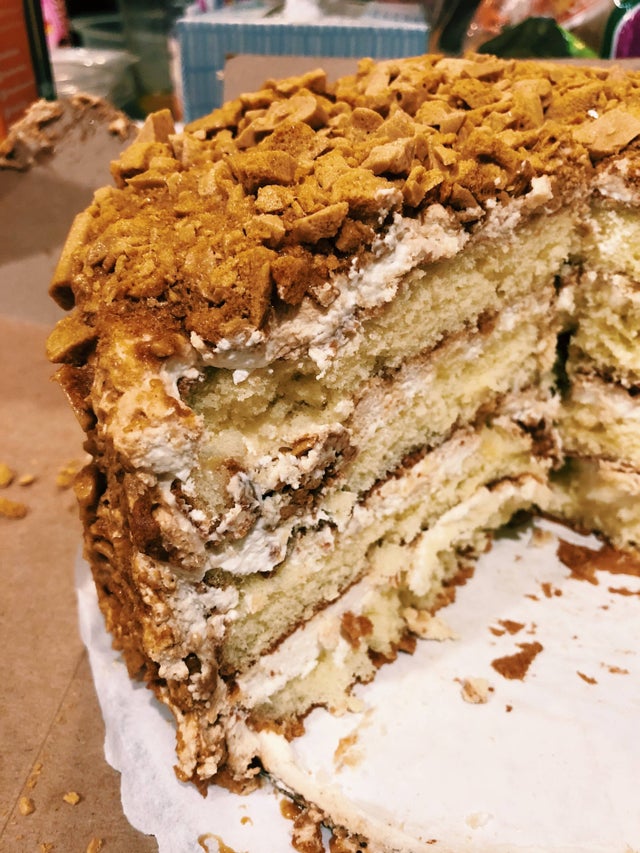
The coffee crunch cake is a sinful composition of lemon-vanilla flavoured, sponge cake layers, smothered generously with coffee-infused whipped cream, and covered in totality by a coffee crunch toffee topping. The contrast between crisp and soft textures and that of bittersweet coffee with lemon layers is truly exceptional.

The ’70s saw Blum’s shut shop, but the coffee crunch cake lived on in people’s taste buds and also recipes. That said, here’s how to make the perfect coffee crunch cake.

Ingredients for Sponge Cake:

  • 2 1/4 cups cake flour (not self-rising)
  • 1 1/2 cups sugar
  • 1 tablespoon baking powder
  • 1 teaspoon salt
  • 1/2 cup vegetable oil
  • 6 large eggs, separated 
  • Zest of 1 lemon
  • 1 tablespoon pure vanilla extract

Method:

  • In a large bowl, whisk all dry ingredients with half the sugar. Add 3/4 cup water, oil, egg yolks, zest, and vanilla; beat until smooth.
  • Whisk egg whites with remaining sugar until stiff, glossy peaks form.
  • Fold the beaten egg whites gently with the batter in two rounds. 
  • Pour in a 10-inch pan and bake in a pre-heated oven at 325 degrees for 1 hour. Chill for another hour before frosting.

Coffee Frosting:

  • 2 1/2 cups well-chilled heavy cream
  • 2 1/2 tablespoons sugar
  • 2 1/2 teaspoons vanilla extract
  • 2 1/2 teaspoons roasted coffee granules

Ingredients for Coffee Crunch

  • 3/4 cup sugar
  • 2 tablespoons strong brewed coffee 
  • 2 tablespoons light corn syrup
  • 1 1/2 teaspoons baking soda

Method:

  • Line a baking sheet with greasy parchment.
  • In a saucepan boil sugar, coffee, and corn syrup over medium heat to 300 degrees.
  • Remove from heat and after 10 seconds whisk in baking soda until combined and immediately pour over the baking sheet. Do not spread and let it cool for 30 minutes.
  • Break into uneven pieces with a spoon.

Assemble the cake by covering the halved layers of cake with frosting. Before stacking the layers, cover with the crunch in between. Cover entirely with coffee crunch just before serving.

Baker’s tip: Remember that a lot depends on the starring ingredient—coffee. The whipped cream and the honeycomb flavours can make or break the coffee crunch cake. So, the coffee you use for infusing the whipped cream and for making the crunchy shards must be of stellar quality. The magic of this cake lies in the contrast that the unique caffeinated flavour provides. 

Ingredients make a world of difference. So, choosing the best coffee roasters in Sydney to bake this classic dessert is only fitting to its historical stature. With Grand Cru, your coffee crunch cake will be just perfect and might remind you of Sunday mornings in Union Square.

The EASIEST Homemade Black Forest Cake Recipe!


I love a good old EASY recipe! Especially black forest cake, which seems to be one of the most popular and sought after cakes that everyone seems to – dread making. This recipe is by far one of the easiest black forest cake recipes that will have you jumping for joy and eating it in no-time. 

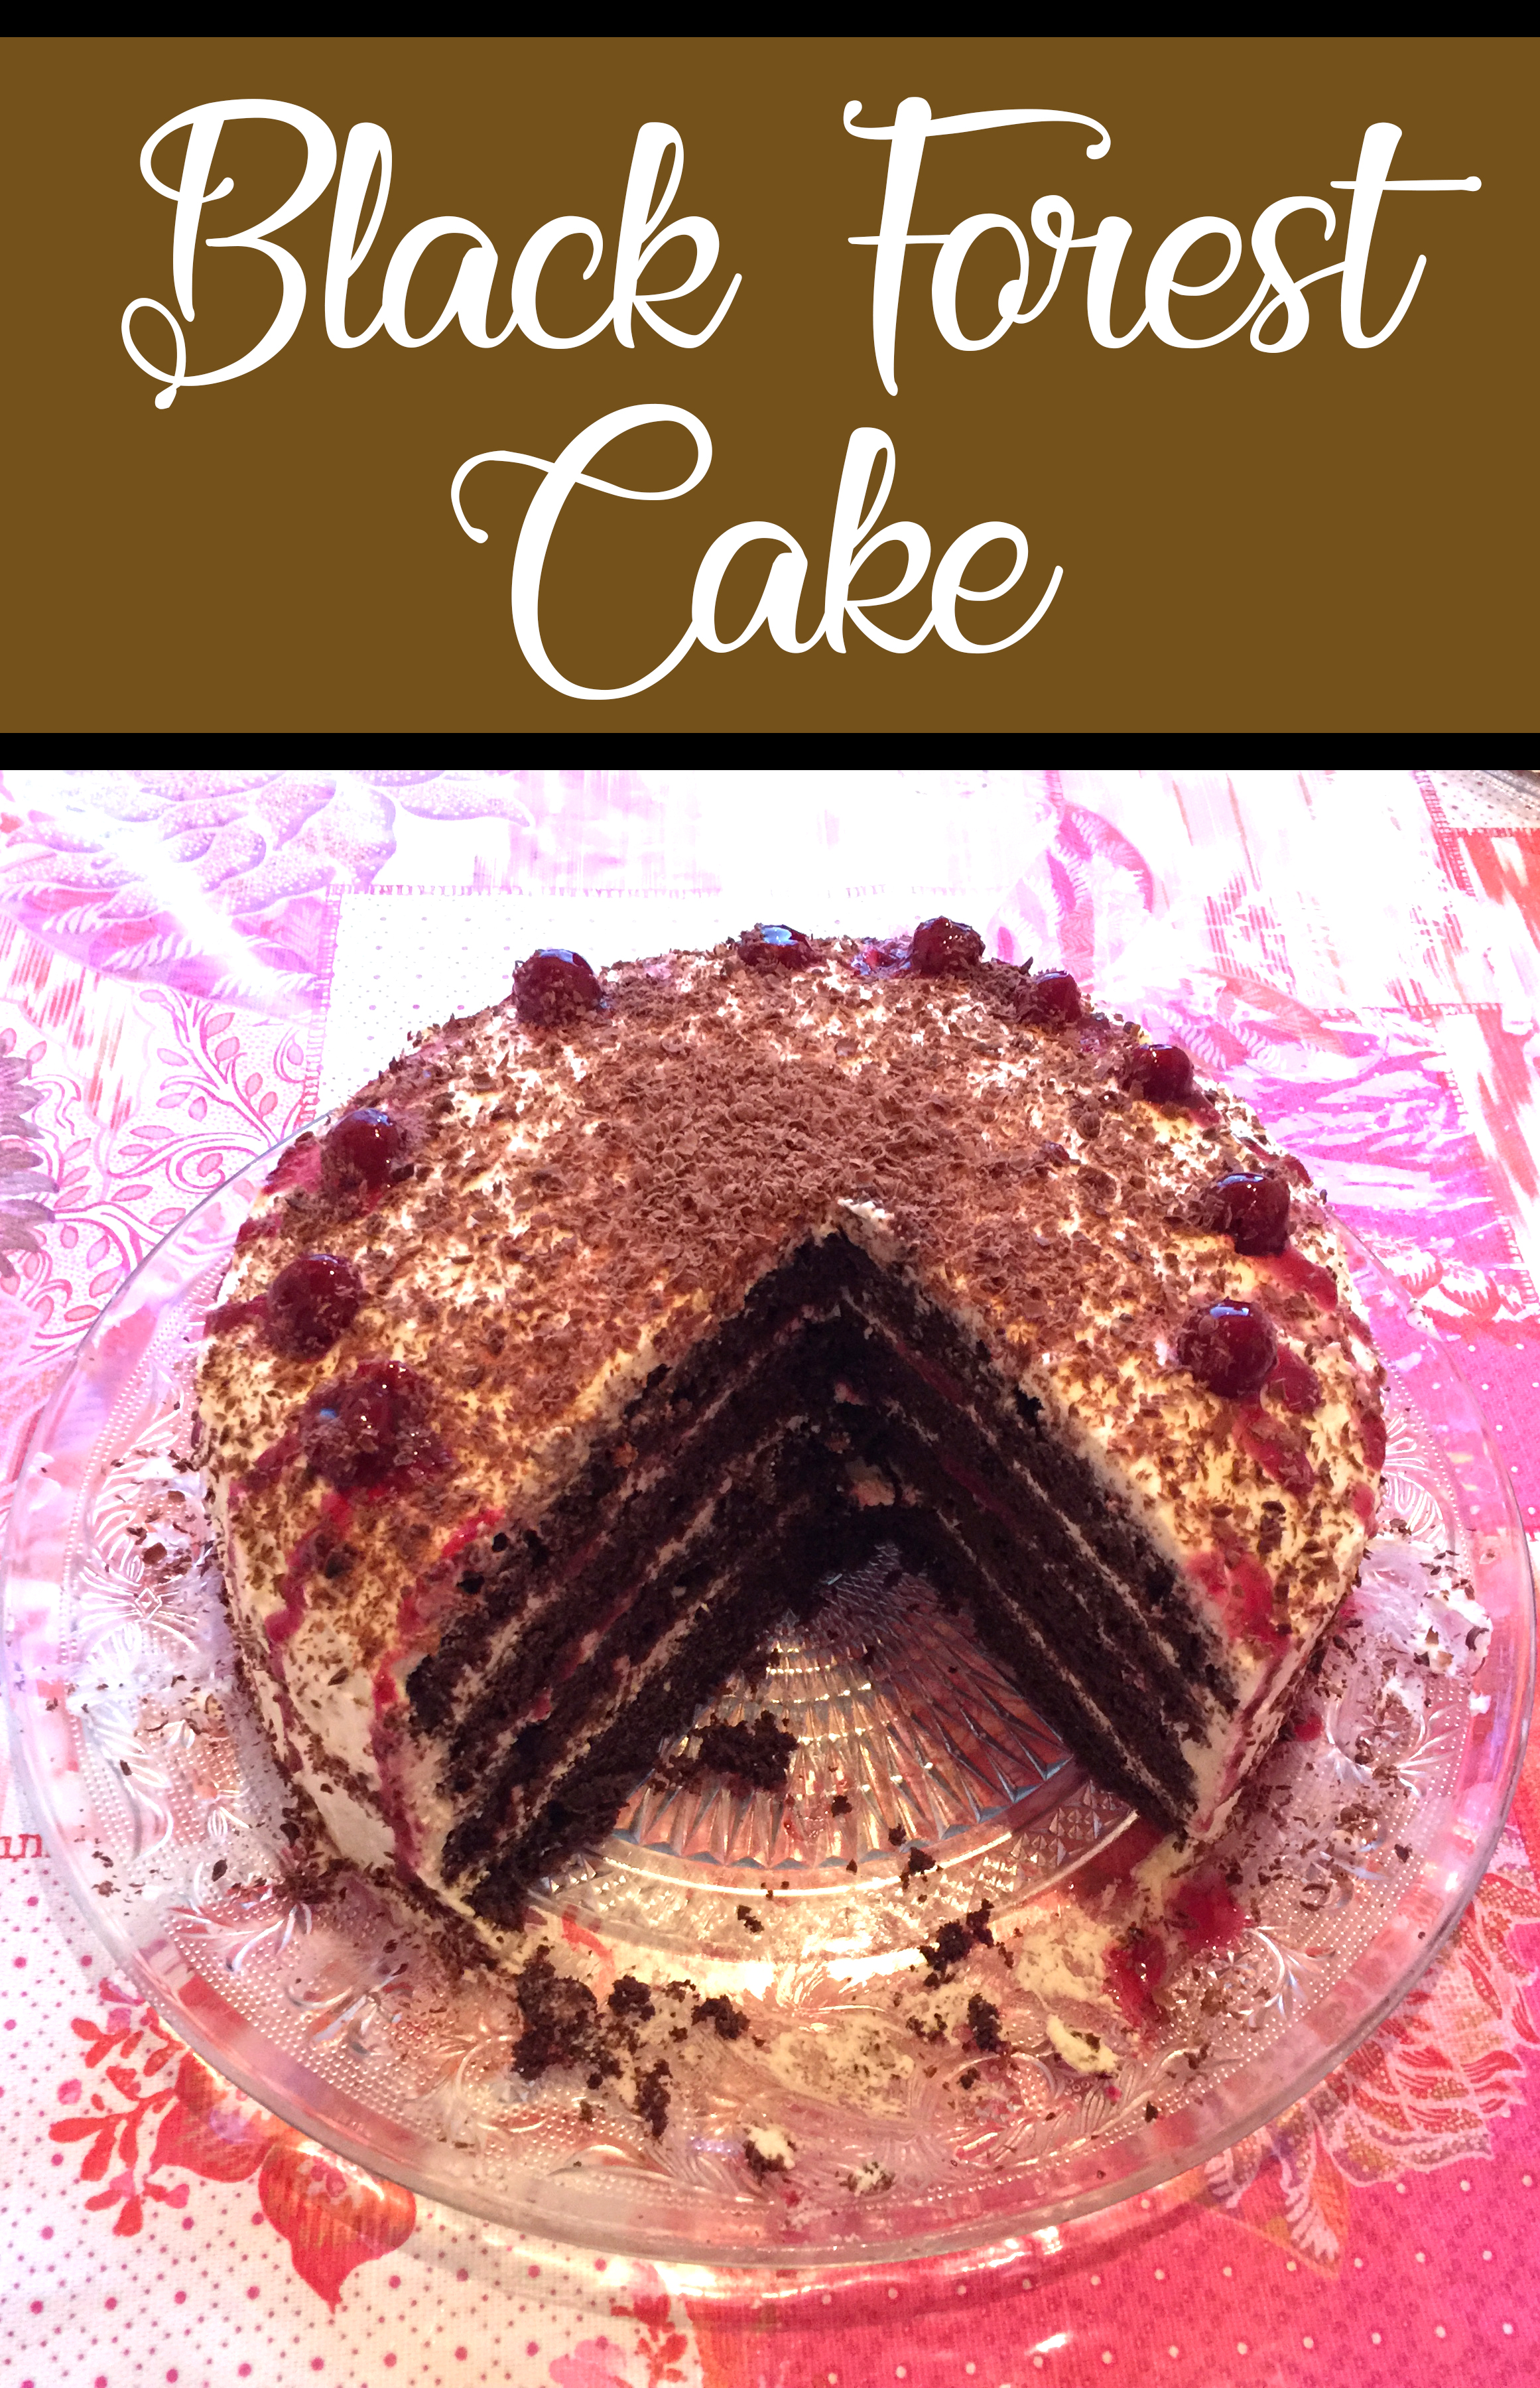
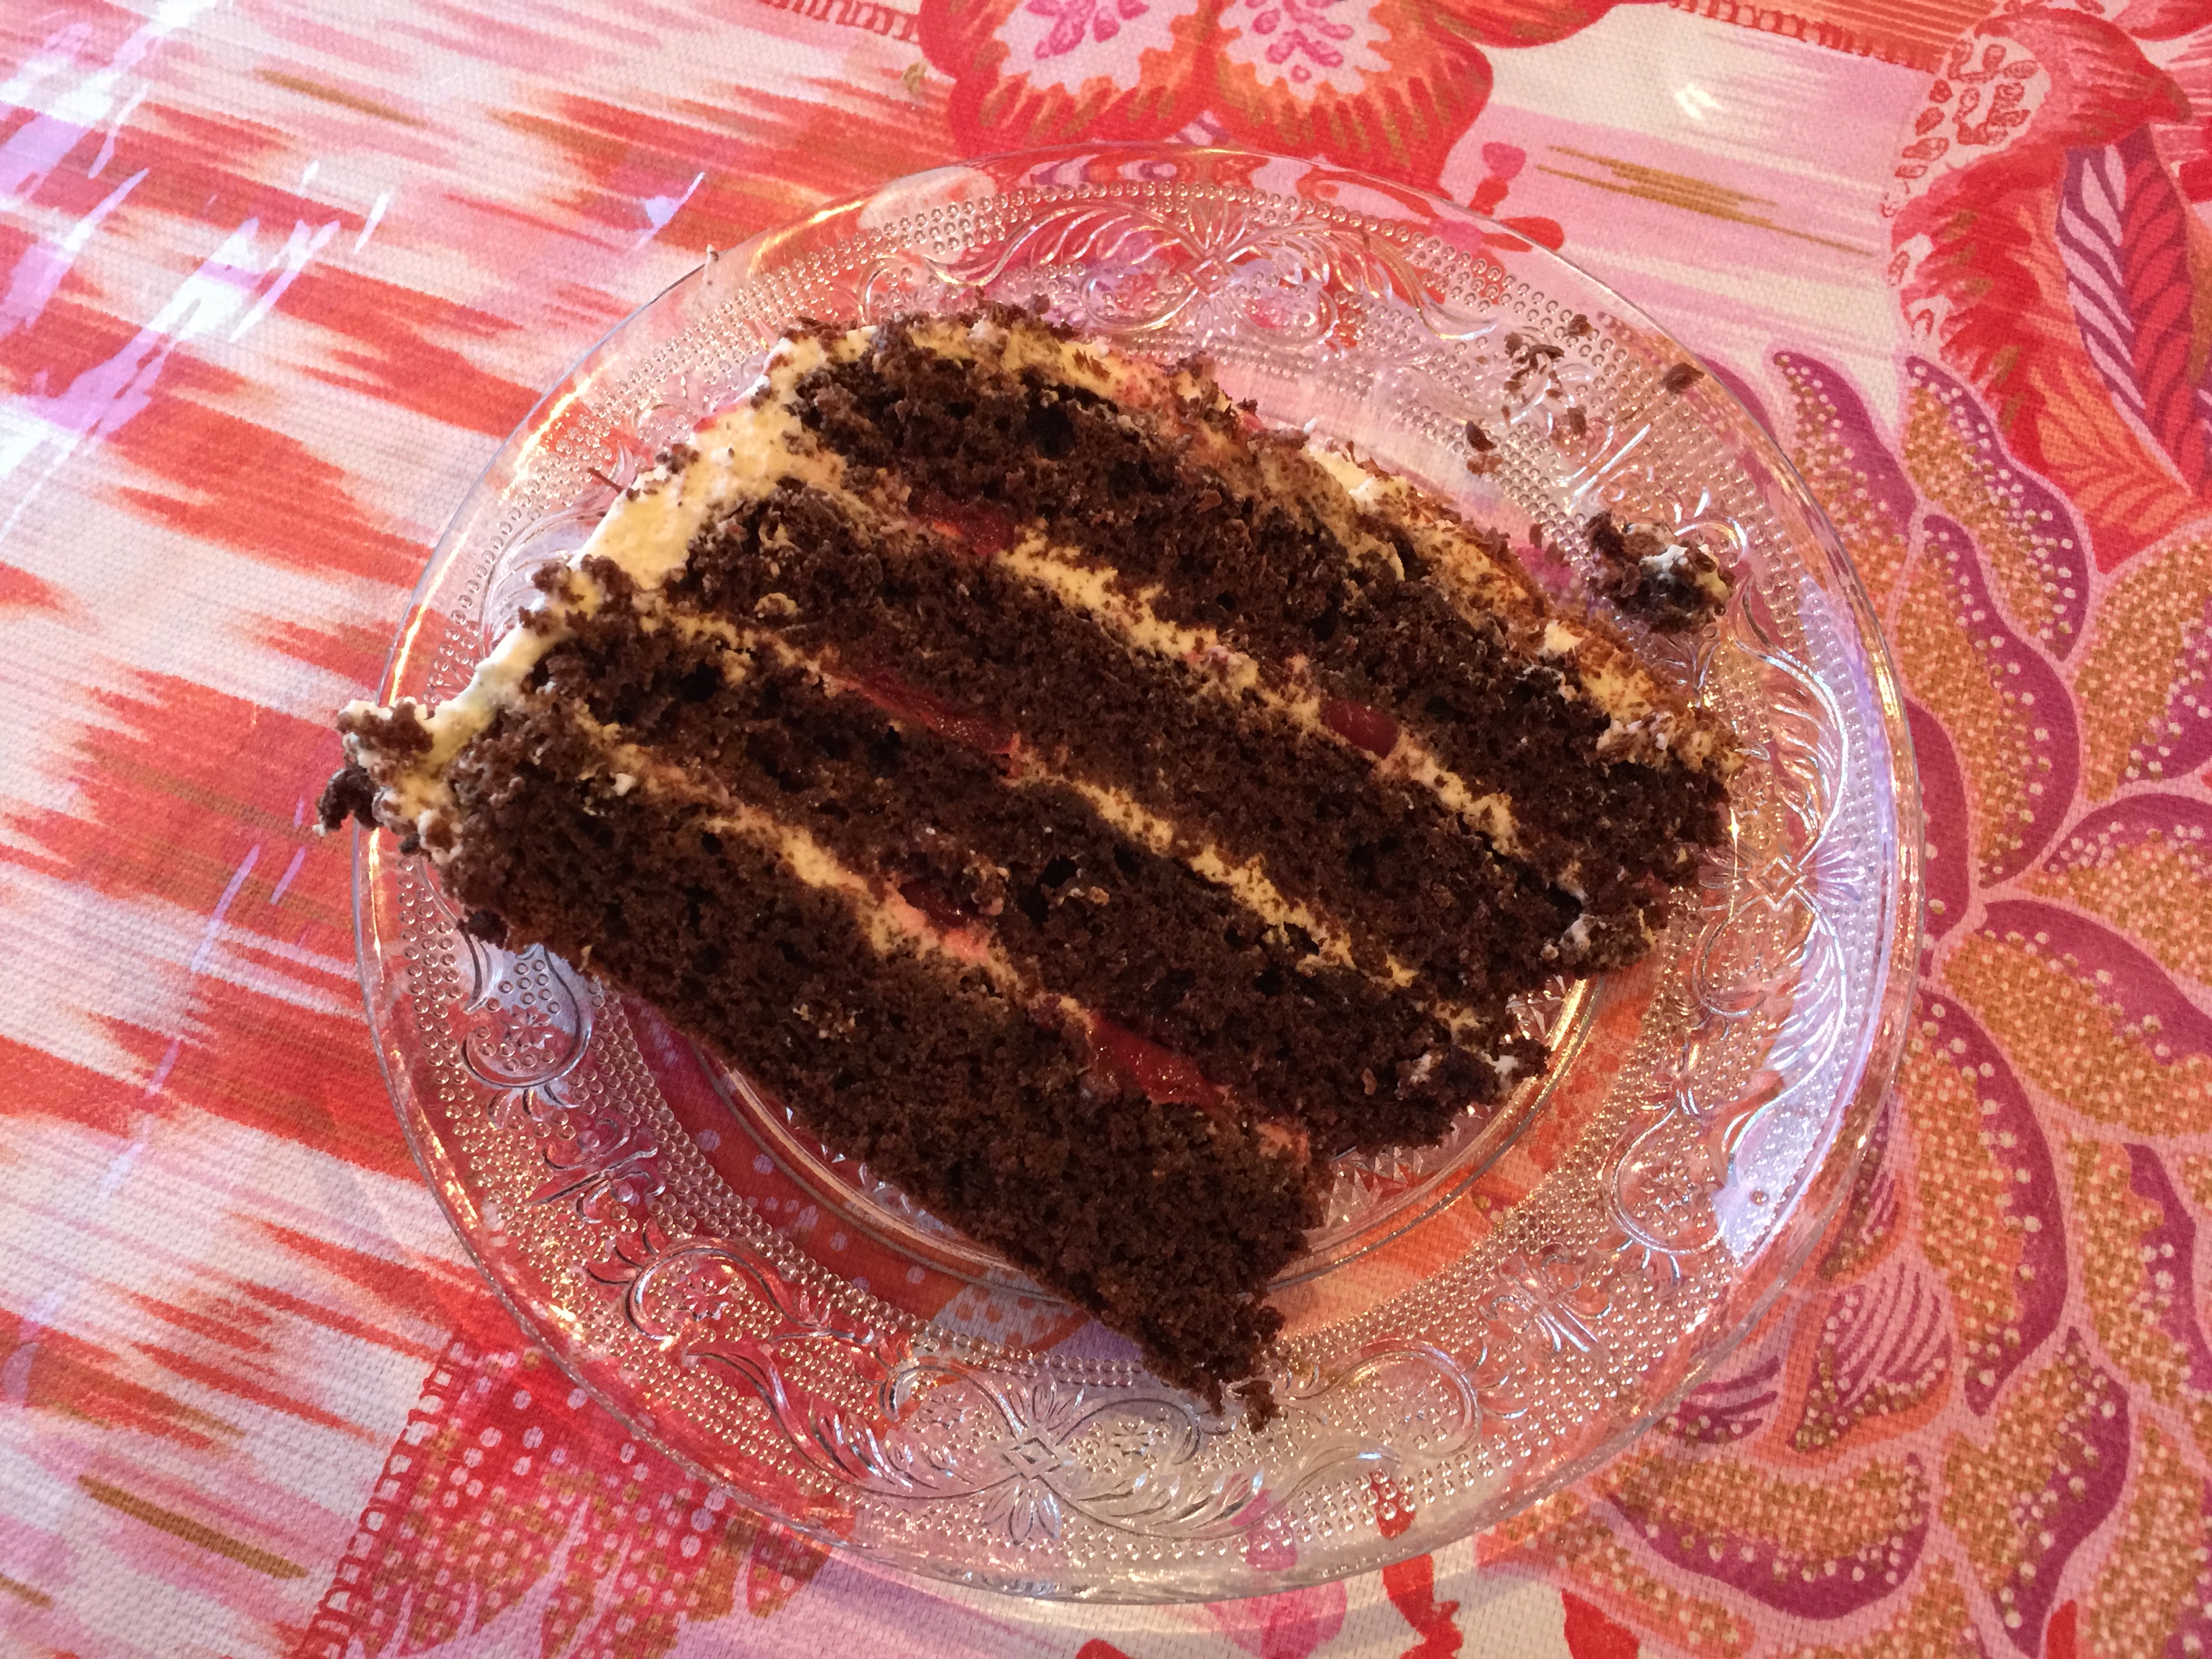
Black forest cake is a German cake with several layers of chocolate sponge cake sandwiched between whipped cream and cherries. To make an ORIGINAL German black forest cake the cake must include “Kirsh: cherry liqueur. To be honest, you can use any one of your favorite cherry liqueurs or one that you have sitting in the pantry and you will achieve the same effect. If you have rum in your pantry instead, you can use that too! The Austrian’s use rum in their black forest cakes instead. Whatever it is that you use, this cake will without a doubt turn out delicious! 

*If you would like to share my recipe and photos please provide proper credit and a link back. Thanks!  

The Easiest Black Forest Cake

Ingredients:

Chocolate Cake Layers:
9 large eggs
½ cup sugar
1 cup all purpose flour
½ cup cocoa powder (unsweetened)
¼ cup softened unsalted butter
1 tsp vanilla extract
Cherry Syrup
1 lb of pitted and roughly chopped cherries
3 tbsp of cherry brandy of your choice
¼ cup of water

To Decorate:

10 whole cherries
3 oz of dark chocolate

Cherry Liqueur Cake Frosting:

3 ½ cups of heavy whipping cream
1/3 cup of powdered sugar
1 tbp cherry liqueur

Directions:

To Make Chocolate Cake Layers:
1. In a mixing bowl using an electric mixer, beat eggs on high. Slowly add in sugar all while continuously mixing until light and fluffy.
2. In a separate mixing bowl, mix together flour and cocoa powder. Using a spatula, fold into egg mixture until well incorporated.
2. Next, fold in vanilla and softened butter until well incorporated. Divide between two 9” pans and bake in a preheated oven at 350F for about 20 minutes or until a toothpick inserted into the middle of the cake comes out clean.
3. For best results, once your cake layers are done baking and cooled on a wire rack, place them in the fridge until you are ready to assemble your cake.

To Make Cherry Syrup:

1. Place pitted and chopped up cherries in a mixing bowl with 3 tbsp of cherry brandy. Let cherries sit in brandy for about half hour, and then separate the cherries from the syrup by draining the cherries over a bowl. Set both mixtures aside.
2. Add ¼ cup of water to cherry syrup and set aside.

To Make Cake Frosting:

1. In a mixing bowl, beat whipping cream on high speed using an electric mixer until peaks form. Slowly add in powdered sugar and cherry liqueur and keep mixing until well incorporated. For best results, put cake frosting in fridge and keep cool at all times until you are ready to assemble your cake.

Cake Assembly:

1. Using a long knife, slice cake layers in half in order to make 4 cake layers. Place first layer on a serving plate or cake stand, and cover with ¼ cup of cherry syrup. Then, cover with approximately ¾ cup of frosting and sprinkle on chopped cherries. Repeat with all layers. Using the remaining frosting to frost the sides of the cake.
2. Using a vegetable peeler, shave chocolate in order to make chocolate shavings. Cover the sides and the top with shaved chocolate and decorate top with whole cherries.

Creative Valentine’s Gifts to Make Your Soulmate Feel Special

Looking for the perfect Valentines day gift? Here are some easy and creative ideas to make your loved one!

Valentine’s day is another beautiful occasion to show undying emotions of love in the relationship. It is a great day to express love and romance with the beloved partner. Valentine’s day also gives an opportunity to the married couples to relive their unforgettable memories with their partners. If you wish to make your husband feel special on this lover’s day, then surprise him with these Valentine’s gifts and romantic gestures.

DELIGHT WITH TEMPTING CAKE:

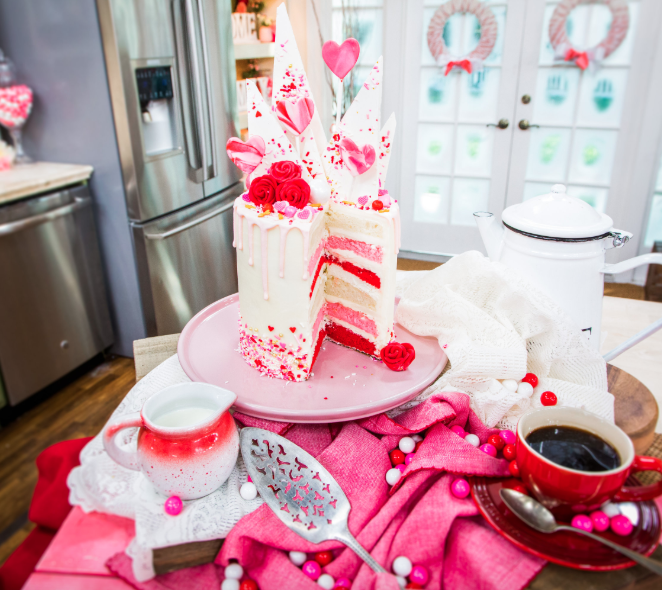
People in their memorable parties always appreciate the presence of a cake. If you wish to make your Valentine’s party more special, then you can also order an attractive Valentine cake online to enjoy some delightful moments of the day. Make sure to prepare the cake with flavors of his choices. You can also choose a beautiful design of the cake to create some unforgettable memories of this Valentine’s day. He will surely enjoy each bite of the cake and feel loved receiving such beautiful moments of togetherness. 

Personalized Grooming Kit:

 A gift for your husband should be helpful to give him some memorable moments of the day. You can choose a customized grooming kit to show your care for him. Put all of his favorite products like shower gel, face cream, deodorant or perfume, and shaving items, etc. in the pack. It may be one of the fantastic Valentine’s day gifts for him to show how much you are dedicated from the heart. You can even personalize the grooming bag with his memorable photo. It will be perfect to carry during his official tours.

A Photo Coffee mug with Red Roses: 

If you want to start this Valentine’s day with a romantic gesture, then you should dedicate bloomings flowers for your husband. I love the idea from Cheryl from blog lamour et fleurs about ordering a designer bunch of red roses online to convey your heartfelt emotions on this lovely day. Try to choose a colorful packing to make it more presentable for him. You can also complement red roses adding a photo coffee mug in the box. Take a cute picture of you with him to print on the cup. It will surely bring a beaming smile on his face on Valentine’s morning.

Handmade Love Cards:

If you want to share your inner emotions with your soulmate, then you can go with the handmade greetings. You can show little creativity to make a presentable card for him. Add romantic poetry, and some love quotes to make him feel special. You can also use memorable photos to decorate a beautiful love card for your loving husband. Try to write rhymes with his and your name to give some romantic moments of the day. It will be the best present to convey your hidden feelings on Valentine’s day. He will surely get to know how much you love him from the heart. 

Smart gadgets for Him:

We live in a world, where our essential daily tasks look difficult in the absence of electronic devices. You can choose a unique gadget to surprise your husband on this Valentine’s day. It can be a smartphone, I-pad, laptop, and digital camera, etc. to give him some fantastic moments. You can even choose a device that he may be planning to buy for a long time. He will be happy to get such a useful gadget from your side. You can also give a personalized cover to hold that particular device.

BEEF JERKY:

The man of your life with love this gift! The Manly Man Company has so many unique beef jerky gifts that make the perfect Valentines day gifts. From beef jerky shaped flowers, meat cards, bacon roses, and even bacon scented wrapping paper, you are bound to find something! Checkout their website for more!

So, you can quickly opt all of these creative gifting ideas to make your soulmate feel fantastic on this Valentine’s day.

10 Kitchen Wallpaper Ideas

If you think wallpaper is confined to libraries, half-baths, and your Aunt Linda’s sitting room, think again. Wallpaper is an affordable, chic way to add color to your kitchen!

Photo by Chronicle Books

The next time you collaborate with your interior designer Los Angeles, keep these 10 kitchen wallpaper concepts in mind.

Create an Accent Wall

Not ready to go all in on wallpaper? Paper just one wall and make it the room’s focal point. Keep your paint, cabinets, and backsplash neutral, and don’t be afraid to use that papered space to showcase your style.

Warm Up Your Pantry

Your pantry maybe under constant assault by your family, but that doesn’t mean it has to look dull. A pop of color between shelves can liven up even the most mundane stockpile of chickpea rotini and canned tomatoes.

Add Texture

Wallpaper is a tremendous way to add texture to a space and decorate your kitchen. Go for grasscloth, make it mica chip, or simply create the illusion of texture with a classic plaid print.

Add a Graphic Print to Your Mid-Century Modern Kitchen

A bold, graphic pattern can fit a variety of kitchens but works especially well in kitchens that have a mod vibe. Team up with your kitchen designer Los Angeles to find a colorful print that fits your space.

Paper the Front of Your Fridge

Got an eyesore of a fridge? Update that drab icebox with wallpaper. It’s an inventive design touch that can be completed in an afternoon. Just make sure to waterproof your paper with a clear sealant as your final step.

Add Depth to Storage Furniture

If you have open cabinets or furniture such as a hutch, papering the back wall can make the items inside stand out. Plus, choosing a brighter shade of paper can lighten up even the heaviest of furniture.

Turn a Corner Into a Breakfast Nook

Using wallpaper to delineate one area of your kitchen from another is an easy way to transform an ordinary corner into a cozy, separate space dedicated to eggs, waffles, and cup after cup of coffee.

Draw the Line Between Kitchen and Dining

In the same vein, you can use wallpaper to define your dining room. By applying wallpaper strictly to the walls surrounding your table, you can mark that spot as separate and inviting in its own right.

Create a Bold Backsplash

Striking prints and patterns work best in small spaces, including the backsplash behind your sink or stovetop. After applying, be sure to cover your work with a coat of polyurethane or a sheet of glass in order to protect it against, well, splashes.

Test Things Out With Temporary Paper

Peel-and-stick wallpaper is perfect for those who aren’t ready to commit to wallpaper or who want the ability to change the look of their kitchen frequently. Simply remove the backing and apply it to the desired surface. Don’t like it? Ready for a change? Peel it right back off again and marvel at the lack of damage to your wall.

A little bit of wallpaper goes a long way in most kitchens thanks to their cabinetry, making it a fun, inexpensive way to add style to the space. When you’re ready to update the heart of your home, don’t be afraid to add a bit of color, a bit of depth, or both.