Make your kitchen look glamorous and feel like a diva baking your next pie with these 7 easy ways!
We all love spending time in our kitchens baking, cooking, and socializing. It’s one of the last places we think of decorating to look glamorous, but it surely can be done. If you’re like me, I love to feel like a diva cooking up a storm and there are a few tricks I’d love to share that will really give your kitchen this look. Follow my guide and you can instantly give your kitchen a beautiful, luxurious new look:
Install Chandeliers
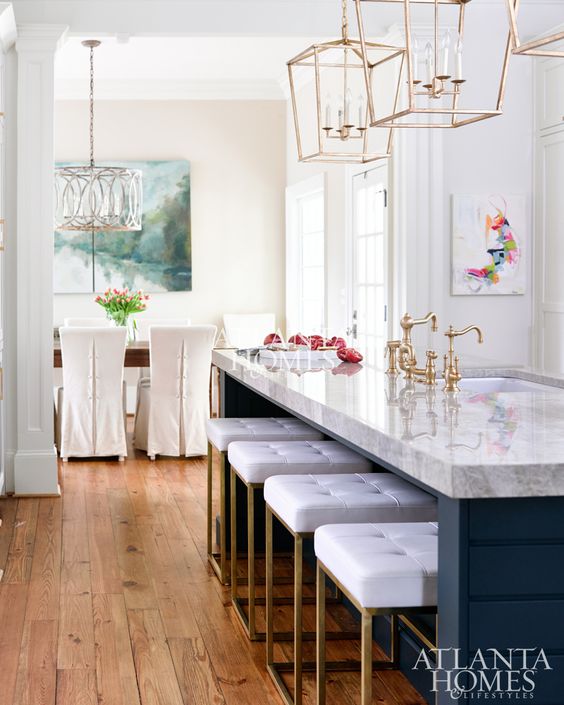
Photo: Atlanta Homes
Bring all eyes on your kitchen island by installing not one, but two fabulous chandeliers right above. Lighting has really come a long way and having a chandelier in your kitchen is a great way in saying “my kitchen is glamorous!” If you don’t have a kitchen island, you can always install one large chandelier in the center of your room. It will truly bring elegance into your traditional kitchen and serve as a stylistic focal point. Not to mention, it’s an easy way to instantly makeover your kitchen!
Marble Subway Tiles

Photo: Home Bunch
I cannot tell you how much I am in love with this look! Marble subway tiles as a kitchen backsplash are a sophisticated, modern way to bring some glam into your kitchen. If you are a fan of an all-white kitchen look, marble subway tiles are your best bet. It’s an easy way to update your space, and you can actually do this installation yourself with some basic tile working skills.
Vinyl Plank Flooring
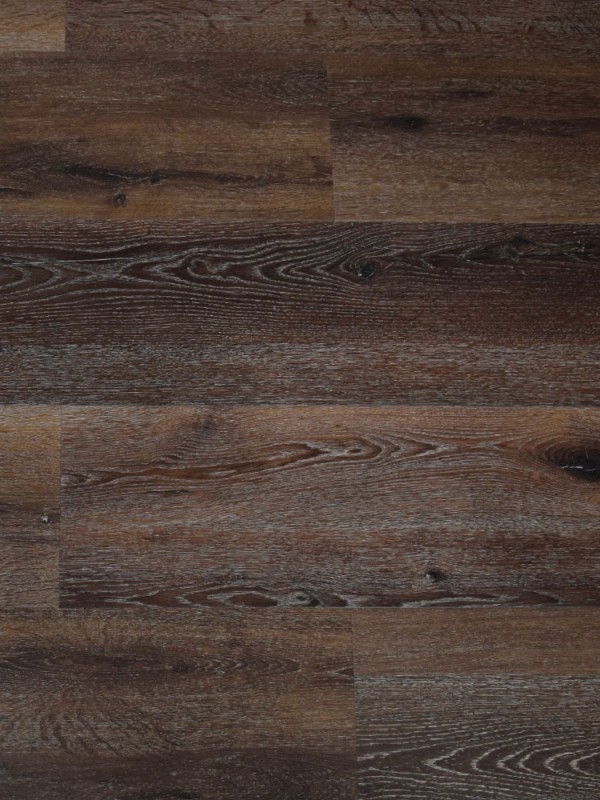
The look of hardwood flooring in your kitchen has long been sought after, but definitely is not a practical decision. That’s where vinyl plank flooring comes in, where you can get the look of real hardwood without suffering the consequences. Vinyl plank flooring is a durable flooring option that doesn’t suffer from humidity, water prone areas, and high-traffic areas like your kitchen, hallway, or bathroom. To see more vinyl plank flooring options click here.
Brushed Gold Faucets and Hardware
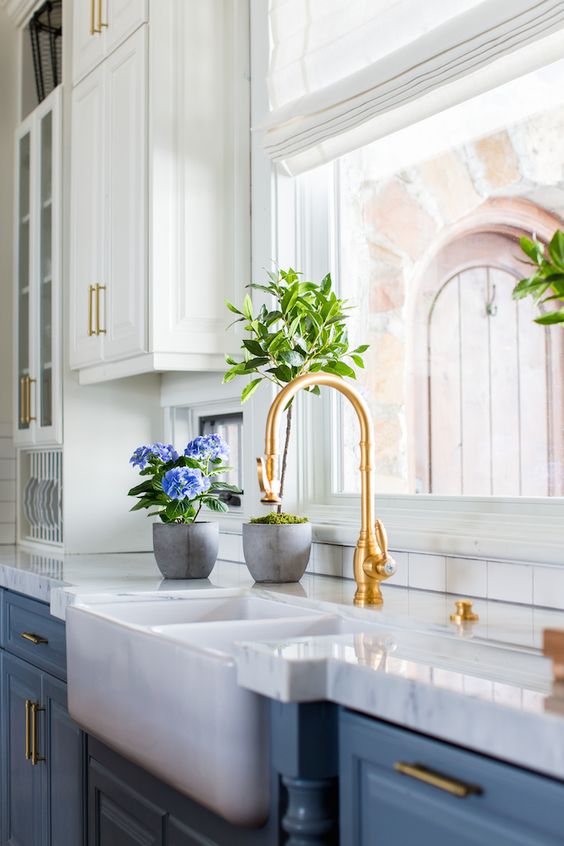
Photo: Becki Owens
It’s time to update your kitchen’s hardware to brushed gold faucets and drawer pulls. This is an easy kitchen decorating update you can do on your own, and it surely makes a huge difference. If you aren’t too keen on renovating your kitchen, just switching up your hardware can give you a big update, without the high price tag. It’s also super stylish to have matching plumbing and water pipes under your sink. I have seen a lot of designers leave the under sink exposed for a stylish, new look. Call your local plumber and see if this is possible with your kitchen.
Open Cabinets
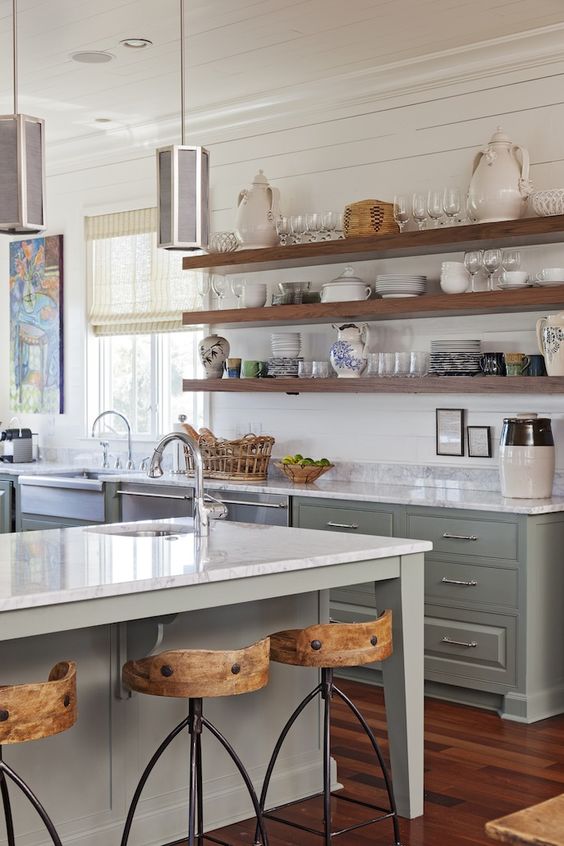
Photo: Intentional Hospitality
Show off some of your prized dish ware by opening up some of your cabinets and having open shelving. This is definitely not a look we would recommend for the whole kitchen, even though it’s super trendy right now. Most homeowners hate this look, and think it looks cluttered, and unsanitary. You are the judge, what are your thoughts on open shelving? We think you should install it only in one small part of your kitchen, to give you the chance to stay on trend and show off your dishes.
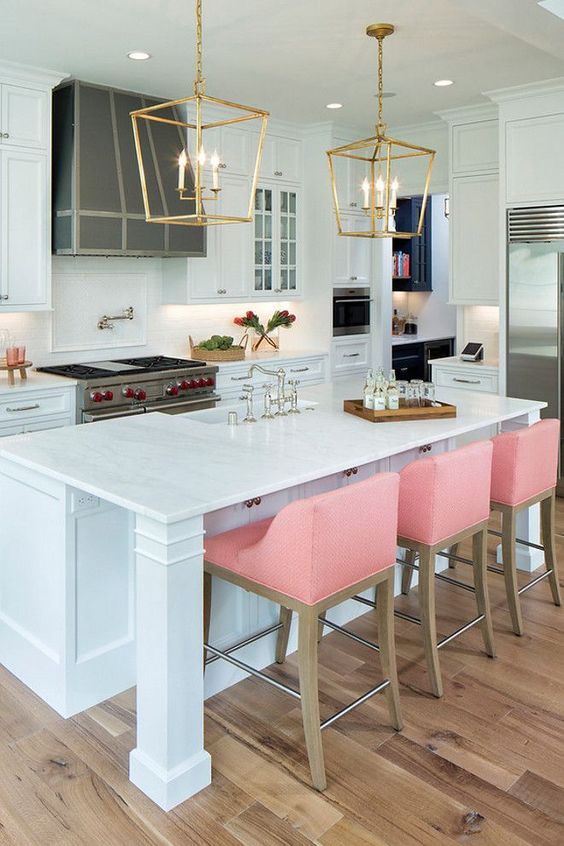
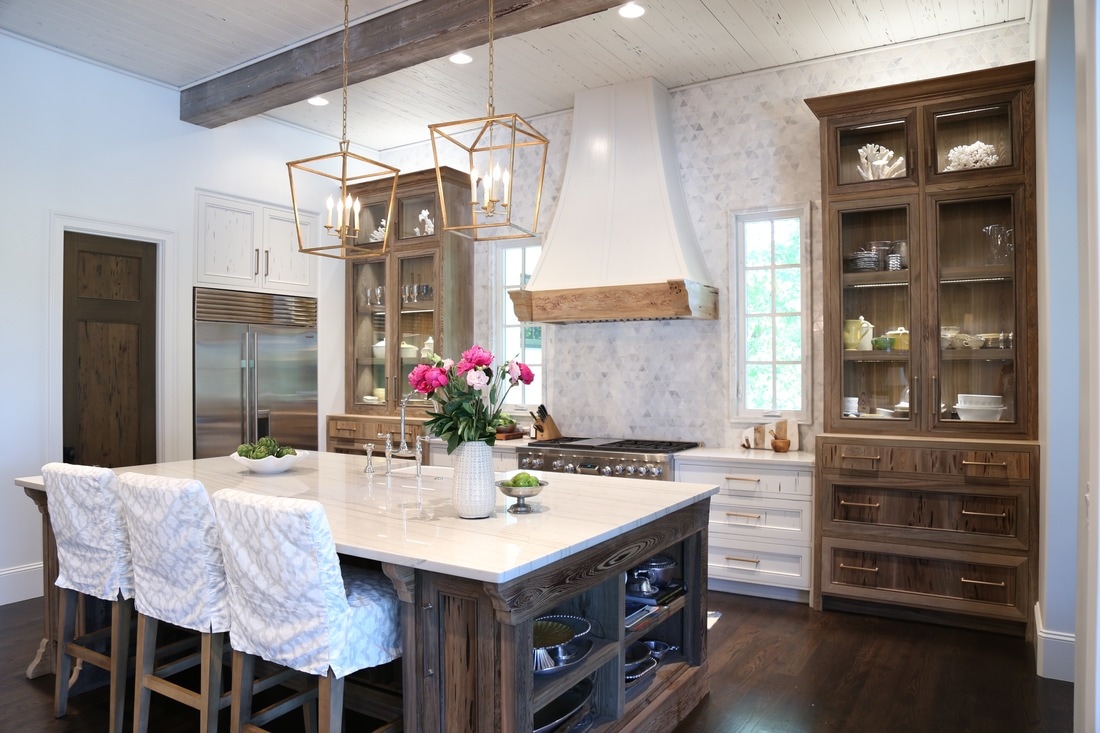 Photo: Old Seagrove Homes – Cynthia Rice
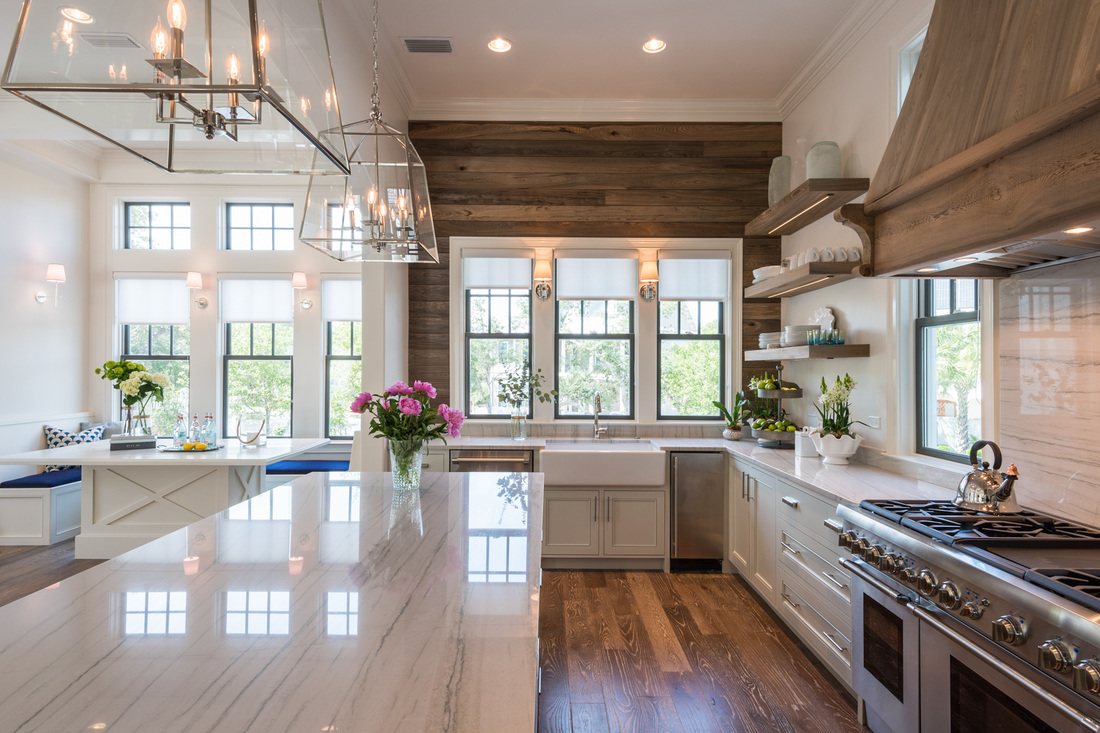 Photo: Old Seagrove Homes – Cynthia Rice
 Photo: Homedit.com
 Photo: AnneMakeup.com
 Photo: Torie Jayne
 Photo: