Bread Basics: How to Make Perfect Loaves Every Time

There’s nothing quite like the aroma of fresh-baked bread filling your home. Whether you’re a seasoned pro or a beginner, mastering the art of bread making is an essential skill. In this guide, we will cover the basics of bread making and provide you with tips and tricks for perfect loaves every time!
 

Photos By: Unsplash

From selecting the right ingredients to kneading and shaping the dough, you’ll learn everything you need to know to make delicious bread at home. So, roll up your sleeves and let’s get baking!

Ingredients

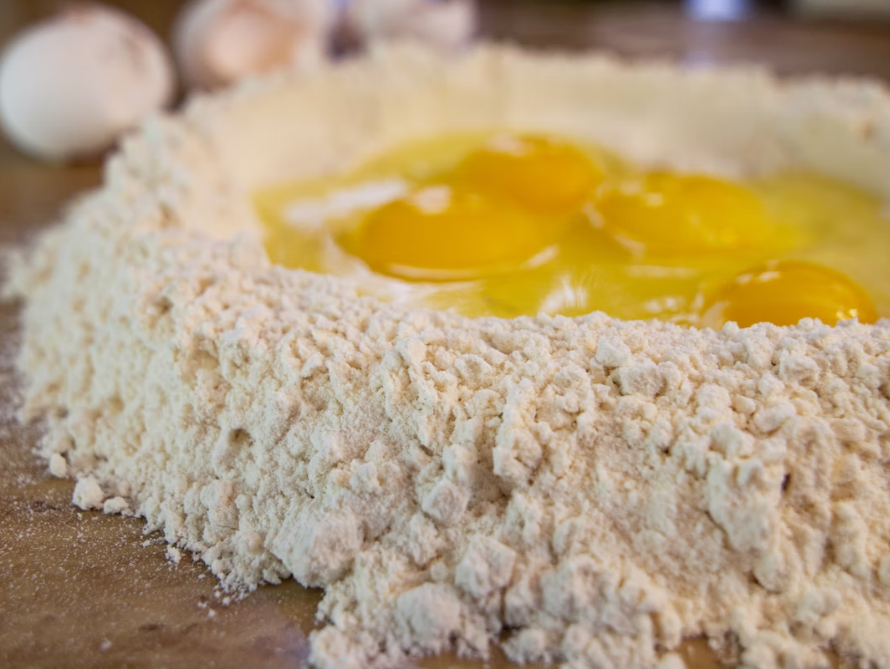
The key to baking perfect bread is having the right ingredients. Here’s a breakdown of the essential ingredients you’ll need:

  • Flour: The type of flour you use will affect the texture and flavor of your bread. All-purpose flour is a good choice for beginners, but you can experiment with bread flour, whole wheat flour, and other types of flour to achieve different results.
  • Yeast: Yeast is what makes your bread rise. You can use active dry yeast, instant yeast, or fresh yeast. Follow the instructions on the package to activate the yeast properly.
  • Salt: Salt is important for flavor, but it also helps control the fermentation process and strengthens the gluten structure in the bread.
  • Sugar: Sugar adds sweetness and helps feed the yeast. You can use granulated sugar, honey, molasses, or other sweeteners.
  • Water: Water is the main liquid in your dough. It should be warm (around 110°F) to activate the yeast but not too hot to kill it.

Other optional ingredients you may want to include in your bread recipe are milk, eggs, butter, and herbs or spices.
Techniques

Making bread is not just about mixing the ingredients and putting them in the oven. There are specific techniques that need to be followed to get the perfect loaf. Here are some essential techniques you need to know:

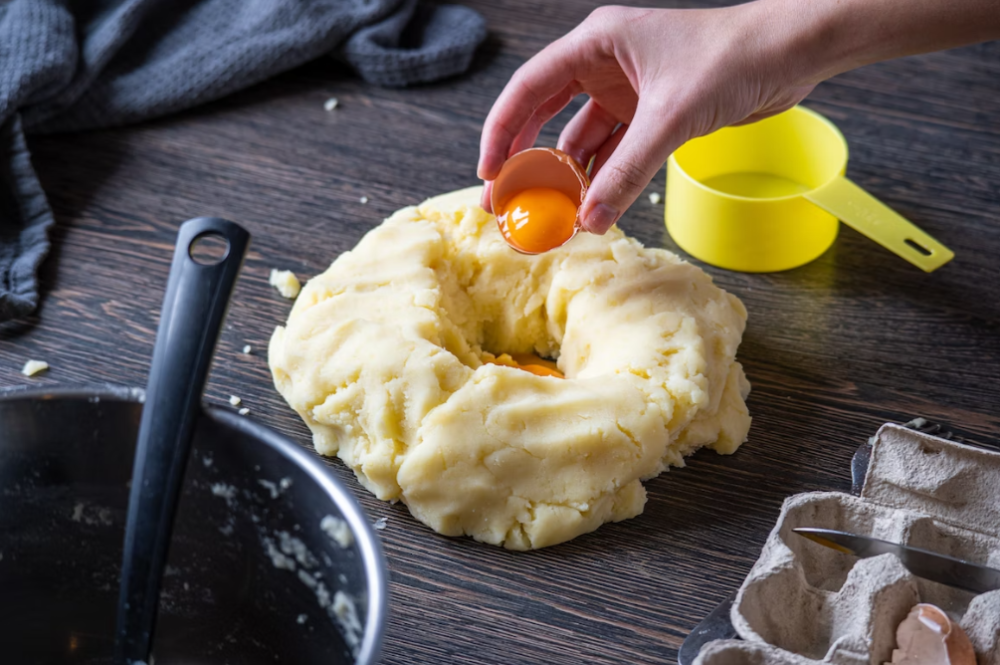
  1. Mixing: One of the most important steps in bread making is mixing. It’s essential to mix the ingredients properly to achieve the right consistency. Mixing can be done by hand or with a mixer, but it’s important not to over-mix as this can make the bread tough.
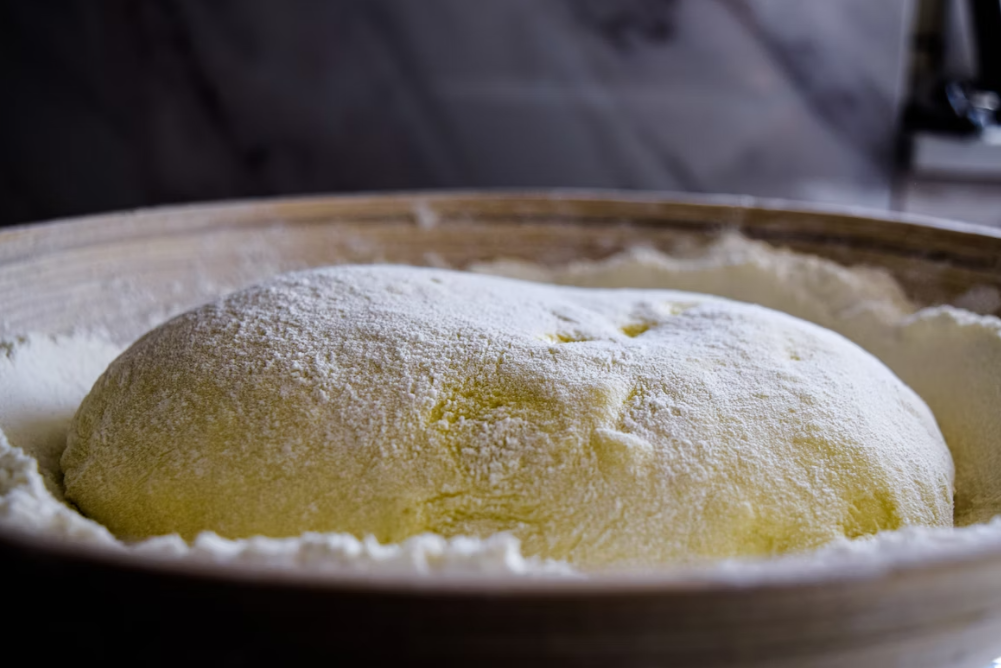
  2. Kneading: Kneading is an important step in developing gluten in the dough, which gives the bread its structure and texture. Kneading also helps to distribute the yeast evenly throughout the dough. It’s important to knead the dough until it’s smooth and elastic, which usually takes about 10-15 minutes.
  3. Rising: The rising process is crucial to the success of your bread. The dough needs to be placed in a warm, draft-free place for the yeast to work its magic. The ideal temperature for rising is between 80-85°F. You can cover the dough with a damp towel or plastic wrap to prevent it from drying out.
  4. Shaping: Shaping the dough is where the art of bread making comes in. There are many different ways to shape bread, depending on the type of bread you are making. It’s important to handle the dough gently to avoid deflating it.
  5. Scoring: Scoring is the process of making shallow cuts in the surface of the dough before baking. This helps to release the steam from the bread as it bakes, which results in a crispy crust. It also allows the bread to expand evenly in the oven. Use a sharp knife or a bread lame to score the dough.
By mastering these essential techniques, you can make perfect loaves of bread every time.

Baking

Baking bread is not just about mixing and kneading the dough, it’s also about the baking process itself. After you have shaped your dough, it’s time to put it in the oven. But before that, you need to make sure your oven is preheated to the correct temperature. This is important because the right temperature will help your bread bake evenly and rise properly.

When it comes to baking times and temperatures, there are many variables to consider. These include the size and shape of your loaf, the type of flour you used, and the moisture content of your dough. Generally, most breads bake at 375-425°F (190-220°C) for 30-40 minutes, but it’s always best to refer to your specific recipe for guidance.

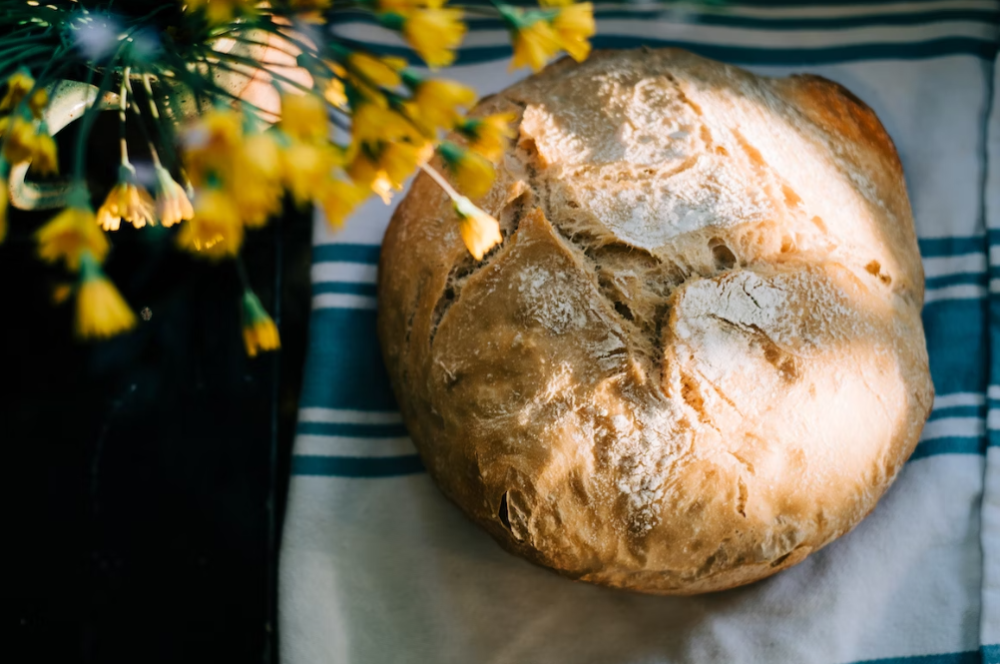
To test if your bread is perfectly baked, you can tap the bottom of the loaf. If it sounds hollow, it’s ready! Another way to check is to insert an instant-read thermometer into the center of the loaf. If it reads between 190-210°F (88-99°C), your bread is fully cooked.

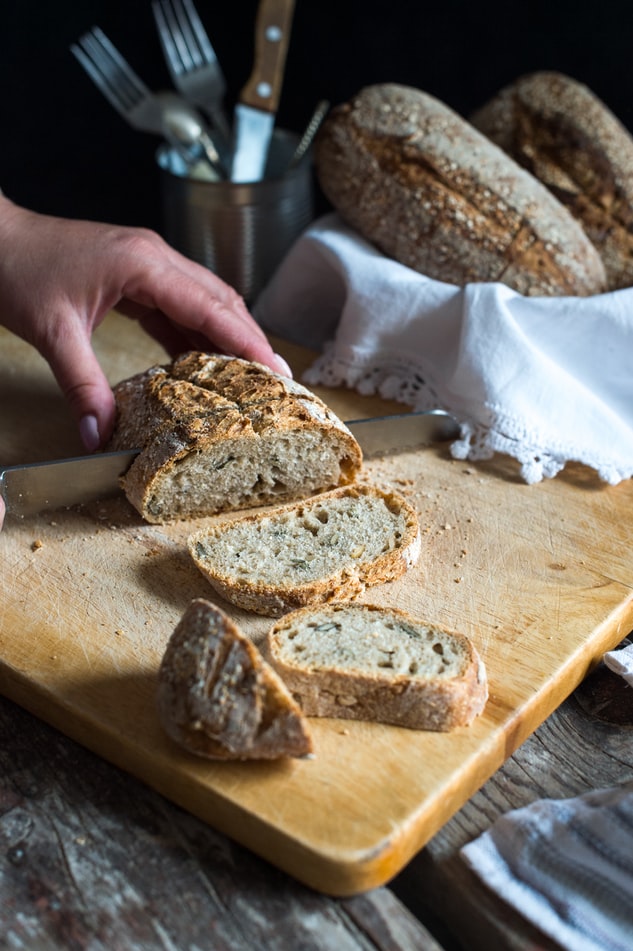
Once your bread is out of the oven, it’s important to let it cool properly before slicing into it. This allows the crumb structure to set, giving your bread a chewy texture and preventing it from becoming too gummy. The cooling process can take anywhere from 1-2 hours, depending on the size and shape of your loaf. You can cool your bread on a wire rack or a clean towel.
Troubleshooting

Bread making can be a finicky process, and even experienced bakers can run into issues from time to time. But don’t fret – with a little knowledge and practice, you can troubleshoot most common problems and end up with a perfect loaf every time.

One of the most common problems in bread making is over-rising. This can cause the dough to become too light and airy, resulting in a flat or misshapen loaf. To avoid over-rising, be sure to pay attention to the timing and temperature of your rising environment. If your dough has risen more than it should have, you can punch it down and reshape it before letting it rise again.

Under-rising can also be a problem, resulting in a dense and heavy loaf. To ensure your dough rises properly, make sure your yeast is fresh and active, and that your rising environment is warm and draft-free. If you’re still having trouble with under-rising, try adding a little extra yeast or letting your dough rise for a bit longer.

Tough crusts are another issue that can plague bakers. To get a softer crust, try brushing your loaf with melted butter or oil before baking, or baking it covered for the first part of the baking process.

Sticky or misshapen loaves can also be a problem. If your dough is too sticky, try adding a little extra flour. If your loaf is misshapen, make sure you’re shaping it properly and that it’s not sticking to your work surface.

With a little practice and patience, you’ll be able to troubleshoot most bread making problems and achieve perfectly baked loaves every time.

Try all these tips to bake the perfect bread to have with your favorite dish. If this guide wasn’t enough, we’ve also got your dish covered, check a recipe here: https://minuterice.com/recipes/rice-stuffed-eggplant-parmesan/. Enjoy and let us know how it goes!


Baking Trends Explained – The Latest Ideas Landing On Your Kitchen Countertop

Who doesn’t love the smell of fresh bread? It’s well known that stores will often spread the smell of baking to their entrance in order to entice customers inside!

 
Photos By: Unsplash
 
With the American Bakers Association reporting that the baking industry generates more than $30 billion each year in revenue, and that the economic impact of baked goods totals $423 billion, it’s no surprise that keeping up with the latest baking trends is big business for anyone who loves creating, selling or eating donuts, pastries and rolls. The question is, where will the business of baking branch out next? 
 

Flour for days

 
We all know about all-purpose flour, but things in the field of grains and wheat are getting much more interesting this year, with stores beginning to stock items such as tigernut, buckwheat, coconut flour and spelt, in addition to some lesser known varieties such as banana flour. With so many different options on offer, bakers can get more creative, experimenting with never-baked-before treats and savory snacks in adventurous ways. Green banana flour bread with a bit of added apricot, anyone? 

Sustainability in baking

 
Everybody who keeps up with the news will understand that sustainability is having an impact on the way people do things across the globe – and the same goes for baking. Increasingly, incorporating healthy, allergy free substitutes is forming a big part of new recipes, with butter, egg and milk substitutes being used to bring forward a whole new way of baking brownies, cookies and cakes that are different in make up, but still the same style as more traditional options. Just as with many other delicious dietary categories, there are lots of food subscription boxes available especially for baking – so one option for expanding your culinary repertoire might be to take a look at some of the baking boxes out there, and see if you can discover new baking tricks and techniques along with some different and interesting ingredients. 
 
If you’re still using dairy, then the range of alternatives is evolving there too, and curd, mascarpone and labneh are some of the new arrivals on the baking scene, replacing standard dairy ingredients. Baking with a wider variety of elements, often more plant based, echoes the move towards responsibility for the planet, which is being seen in a huge range of sectors, including the culinary world. This even extends into baking equipment, with sustainable knives, chopping boards, plates and cutlery all available to prepare and show off your creations. 
 

It’s not all about taste

 
Yes, taste is obviously important. However, many bakers are now working on making their creations a complete multi-sensory experience, focusing on textures, flavors and shapes that work together to create a picture-perfect, delightfully balanced whole. Crunchy cookie can mingle with airy dairy, and foods that melt in your mouth can be paired with flavors that leave a delightful lingering aftertaste. In the food industry, generally this is known as ‘gastrophysics’, a field of science which looks at how our brains interpret and understand sensory cues given as we eat, and how that influences the way we perceive food too. At the end of the day, people may not understand why they love your baking, but the important thing is that they do.
 

Mixing up menus

 
The middle east offers a huge amount of influence on baking currently, with recipes involving saffron, sumac, tahini and pomegranate on the up. Medjool dates play a big part in the sustainability agenda discussed above, and many other middle eastern ingredients also fit the responsible and eco-friendly baking bill. Ever tried semolina pudding flavored with rose and vanilla? It might sound a bit odd, but it tastes delicious – and there are a wide variety more similar examples to choose from if you want to make something a little bit different. 
 
Whatever your baking preferences and style, get ready to incorporate a whole new range of ingredients and ideas into your repertoire, and feel good doing it. It’ll help your health, your culinary community, and ultimately, the world. 

Cheesy Mushroom Spinach Puff Pastry Recipe

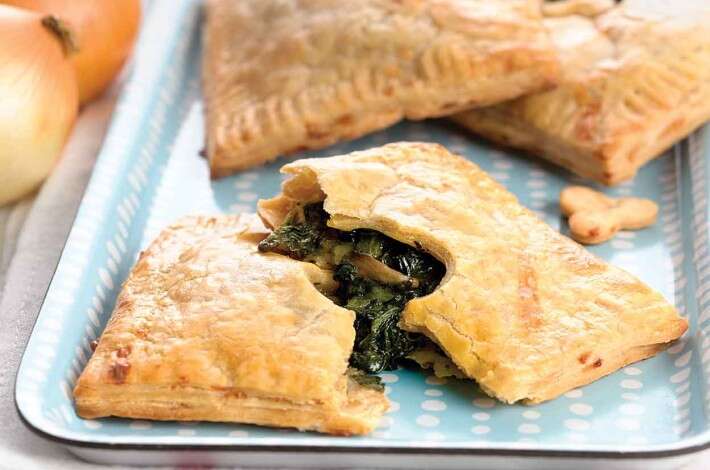
We recently purchased a huge batch of oyster mushrooms from Little Acre Mushrooms last week and given the fact that there isn’t a great deal else which we can be doing right now, we have been going through just about as many mushroom recipes as we could find. We both agreed at the moment that our favorite of the bunch is this delightful cheesy, mushroom and spinach puff pastry square, and I am telling you that it is just to die for.

I had previously been staying away from pastry given that I am not exercising as I used to, and refuse to come out of lockdown overweight. I have, however, given myself permission for this particular dish, because it is just too sumptuous to pass up. If you want to try something new in the kitchen, here is the recipe for these tasty little bites!

Ingredients

These are just the ingredients which I have used but you can of course play around with different varieties of mushrooms, different cheeses and you could even add a couple of additional herbs.

To make this you will need:

  • 2 tbsp butter
  • 12 oz mushrooms
  • 4 cloves minced garlic
  • 4 cups baby spinach
  • ½ tsp salt
  • ½ tsp black pepper
  • 1 cup shredded cheese, we mixed cheddar with some hard mozzarella
  • 1 puff pastry sheet
  • 1 egg + 1 tsp water, whisk this up together

Let’s Get Cooking

1. First of all set the oven to preheat, I set mine to 400 degrees. Next up heat a skillet over a medium heat and get the butter in there to melt, once the butter reduces toss your mushrooms in and sauté for around 7 minutes, then add the garlic and sauce for another couple of minutes.

2. Once the garlic and mushrooms have softened, add the spinach and season with salt and pepper, the smell should already be whetting your whistle, allow of this to continue cooking for around 4 minutes.

3. Now it’s time to prepare the pastry, you could make this from scratch if you wish, but I always prefer to just buy the ready-made pastry sheets, a much easier option. Roll the pastry out and simply spoon the spinach and mushroom mix into the center, in a sausage shape. Once you have laid it all out, add your cheese to the top and wrap the pastry over the top, doing so from the top and bottom first, and then bringing the sides over.

4. Finally use your egg wash to coat the pastry packet which you have created, as this will give it a lovely color and texture when it comes out of the oven. I placed this into the middle shelf of the oven and left it for 20 minutes, before turning the heat up to 425 degrees and allowing it to cook for another 5 minutes. Depending on your oven, you may need less time so be sure to keep an eye on this so the pastry doesn’t burn.

5. Remove from the oven, slice into strips and indulge!

Rosemary Bread with Whole Wheat Flour and Olive Oil

whole-wheat-rosemary-bread-recipe-easy-dalmatinski-kruh-recept-better-baking-bible-blog-21-whole-wheat-rosemary-bread-recipe-easy-dalmatinski-kruh-recept-better-baking-bible-blog 2-whole-wheat-rosemary-bread-recipe-easy-dalmatinski-kruh-recept-better-baking-bible-blog

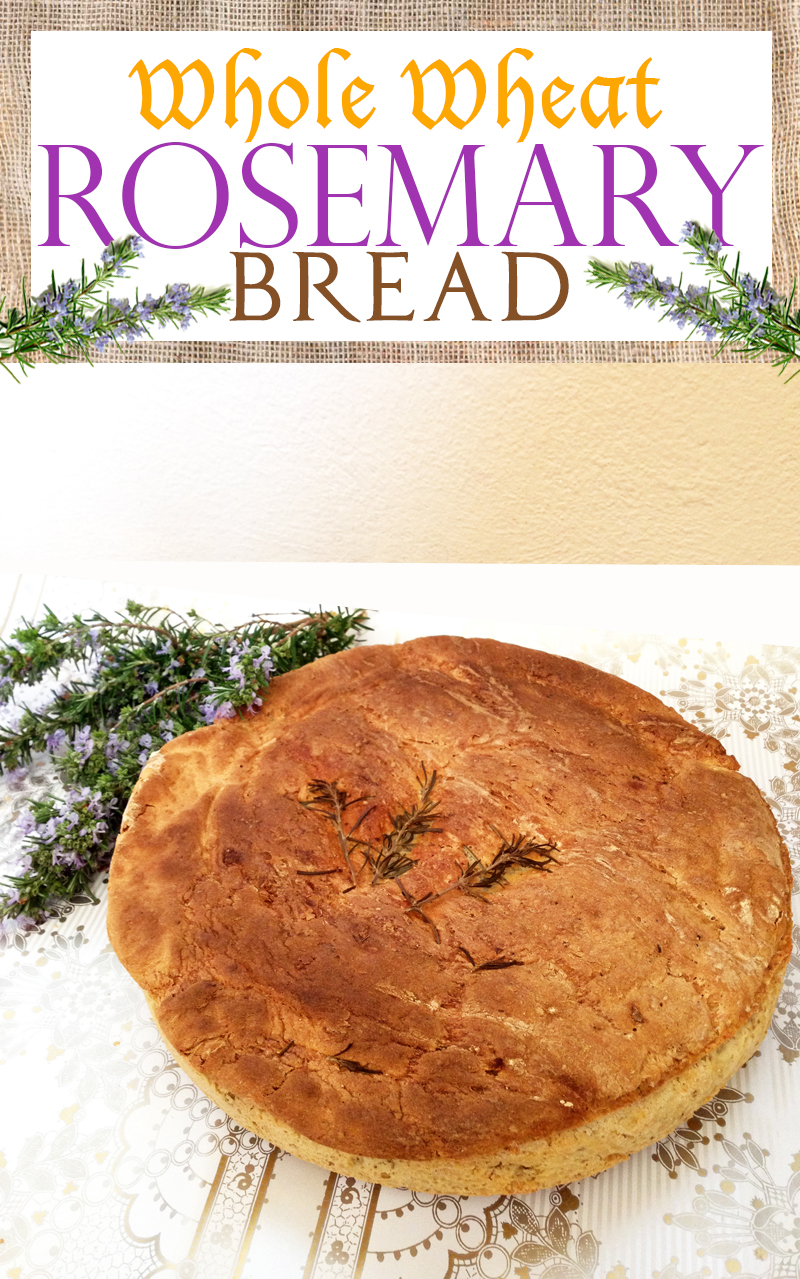
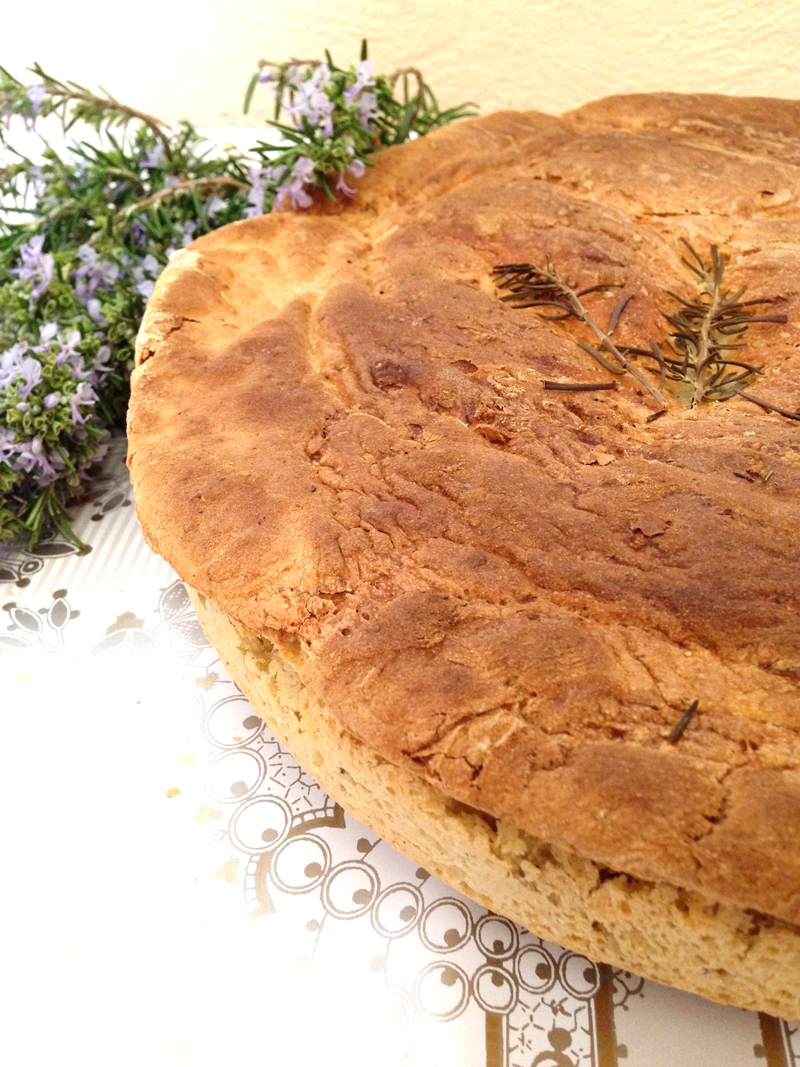
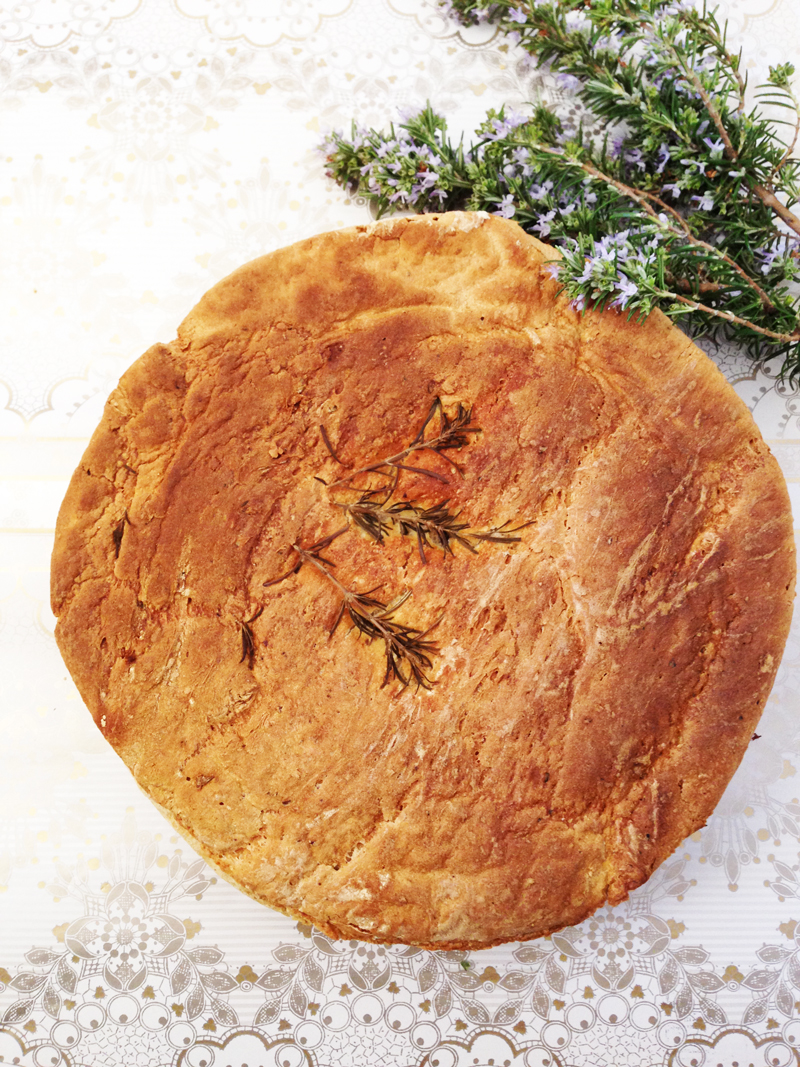
Take a bite into the Mediterranean with this sweet and savory whole wheat rosemary bread! A crunchy crust and a soft inside make this bread a true winner. Rosemary is one of the hottest herbs in cooking and since a few bushes around my home I try to use it in all of my dishes. It’s native to the Mediterranean, and being an evergreen shrub, the bitter needle-like leaves are available fresh all year around.

Including rosemary in cooking or baking is easy and fun since it adds a unique kick to any dish. This whole-wheat rosemary bread makes fantastic spin to regular whole wheat bread, and one of the reasons why it tastes so delicious is because of it’s partner in crime – olive oil. Rosemary and olive oil is definitely a Mediterranean staple and must be paired together to put a seal on any Mediterranean dish. 

To get the most out of this whole wheat rosemary bread, eat it with grilled fish or even slather on some butter while it’s still warm!

*If you would like to share my recipe and photos please provide proper credit and a link back. Thanks!  

Rosemary Bread with Whole Wheat Flour and Olive Oil

 
Ingredients:
 
  1. 1 cup warm water
  2. 1 tbsp granulated sugar
  3. 3 tsp dry yeast
  4. 1 tbsp flax seed
  5. 2 tbsp olive oil
  6. 1 1/2 cups whole wheat flour
  7. 1/2 cup all purpose flour
  8. 3 tbsp rosemary, chopped (if possible use fresh)
  9. pinch of salt
  10. pinch of garlic powder
  11. pinch of freshly ground black pepper
Instructions:
 
  1. In a mixing bowl, add warm water, sugar, and yeast. Let it sit for 10 minutes until bubbly and set aside.
  2. In a separate mixing bowl, combine flours, salt, garlic, chopped rosemary, and olive oil. Slowly add this mixture to the yeast mixture and knead until a ball shape is formed.
  3. Oil a clean bowl and place the ball of dough inside, covering with plastic wrap or a dishcloth. Place in a warm place to rise for 1 hour or until dough has doubled in size.
  4. Once the dough has risen, punch it down. Form dough into a round loaf shape and transfer to a flour dusted baking sheet. Cover dough with a dishcloth and let it rise again for 30-45 minutes.
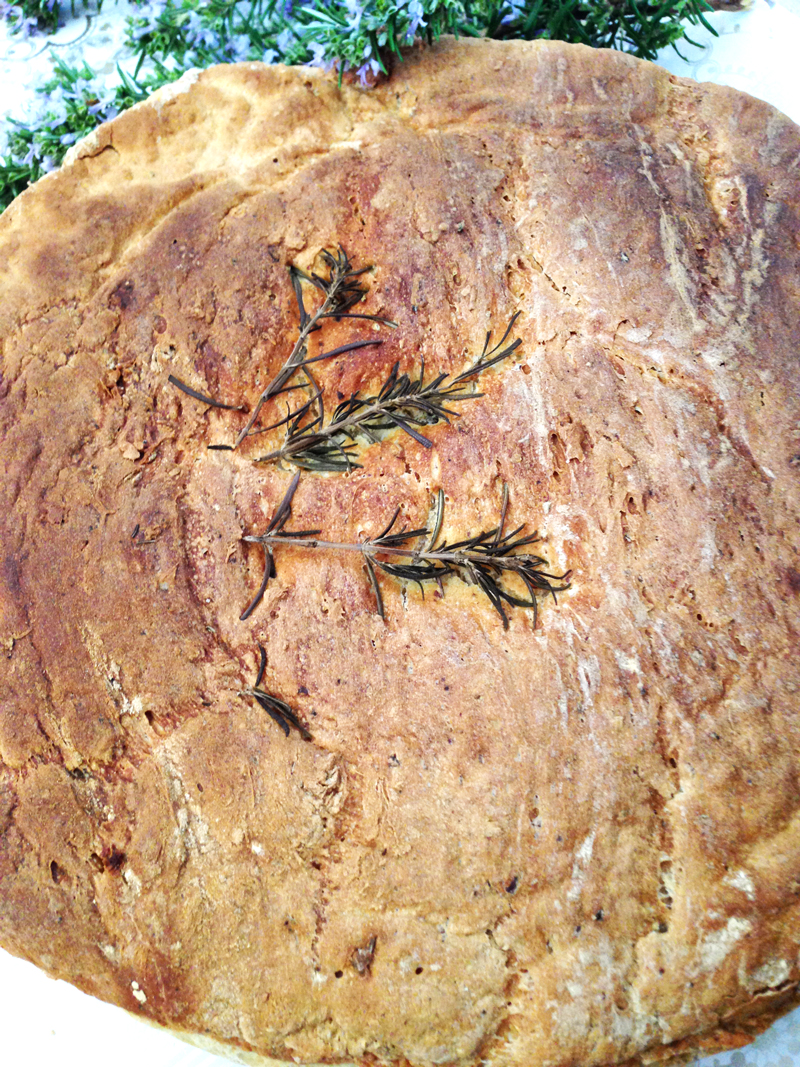
  5. Set oven to 350 F and using a baking brush, brush loaf with olive oil. For decoration, place a few rosemary twigs in the center of the loaf and place in the oven to bake for about 25 minutes. The bread should be golden brown at the top. Remove from oven, allow to cool for 10 minutes before slicing.

3-whole-wheat-rosemary-bread-recipe-easy-dalmatinski-kruh-recept-better-baking-bible-blog

Low Cal Greek Yogurt Chicken Tortilla Wraps

low fat chicken greek yogurt tortilla wraps avocado easy recipe sandwiches better baking bible blog ideas tomatoe cucumber lettuce yogurt pita

These 3 step Greek yogurt chicken tortilla wraps are the perfect light, low-cal lunch that takes just minutes to make! I made these on the weekend and was so amazed at how good they turned out, and how fast they are to make. Trust me, they are sooooo delicious!!

They are a really light meal and are refreshing to eat, perfect for those hot summer days when greasy sodium-packed foods should be avoided. What I love about these tortillas is that they contain no mayo, only Greek yogurt which is an amazing alternative, you won’t even be able to tell the difference! 

This recipe was adapted from Tammy’s avocado and Greek yogurt chicken salad. I didn’t have every ingredient on her list so I had to switch it up a bit, but it turned out just as delicious! 

*If you would like to share my recipe and photos please provide proper credit and a link back. Thanks! 


Low Cal Greek Yogurt Chicken Tortilla Wraps


Ingredients:
 
  1. 1 ripe avocado, removed from skin
  2. ½ cup plain Greek yogurt
  3. 1 tsp garlic granulated garlic
  4. 1 tsp salt
  5. 1 tsp ground pepper
  6. Juice from half a lemon
  7. 2 cups finely chopped chicken (I used a store bought rotisserie chicken)
  8. 1 red onion, chopped
  9. Tomatoes, chopped in squares
  10. 1 Cucumber, sliced thinly lengthwise
  11. 8 medium sized lettuce leaves
  12. 4 Tortillas
Instructions:
 
  1. In a blender blend together avocado, Greek yogurt, garlic, salt, pepper, and lemon.
  2. Pour into a bowl and mix in onion and shredded chicken.
  3. Place two leaves of lettuce onto tortilla and slather mixture over lettuce. Top with tomatoes and cucumber. Roll up and serve!
Notes
 
  1. I spritzed my tortillas with water and placed in oven for about 5 minutes to soften them up. You can also do the same and place them in the microwave, which works better! I also used toothpicks to prevent the tortillas from falling apart!

Chocolate Oatmeal Banana Bread – Eggless, Milk and Sugar Free!

chocolate oatmeal banana bread recipe no eggs dairy free no milk easy oatmeal chocolate chips cinnamon easy healthy no sugar low calorie low cal diet friendly

Eat up this delicious banana bread thats totally eggless, milk-free, and sugar free! I’ve yet to meet a soul that doesn’t like this banana bread, it’s been a signature treat of mine for years and never disappoints. What I love about this bread is that it’s guilt free and super filling. Whole wheat flour (or all purpose flour depending on your preference) and oatmeal provide you with loads of fibre and energy, making it the perfect breakfast or snack option. It’s also great for those on a diet that are looking for a filling, low-fat dessert.

The bread is also very moist and dense, so it doesn’t dry up and can hold at room temperature for quite a while (although because of it’s deliciousness I don’t think it will last very long!). The secret to it’s moist-ness is the yogurt as well as the creamy bananas – make sure to use ripe bananas, the riper the better!

I personally love this bread once it’s cooled down, but you can definitely eat it straight out of the oven or even warm it up in the microwave. Now who can resist melted, gooey chocolate?

*If you would like to share my recipe and photos please provide proper credit and a link back. Thanks!


Chocolate Oatmeal Banana Bread – Eggless, Milk and Sugar Free! 


Ingredients:
 
  1. 2 cups All purpose flour
  2. 1 cup fine oatmeal
  3. 1 tsp baking soda
  4. 2 tsp baking powder
  5. 1/8 tsp salt
  6. 1 tbsp cinnamon
  7. 1/4 cup oil
  8. 2 tsp vanilla extract
  9. 4 ripe bananas
  10. 1.5 cups water/yogurt mixture (container of 200g plain yogurt mixed with water and 1.5tbsp of vinegar)
  11. 100g dark chocolate, chopped into small bits
Instructions:
 
  1. Preheat the oven to 180 C and greese a loaf pan.
  2. Mix together flour, oatmeal, baking soda, baking powder, salt, and cinnamon.
  3. Mix yogurt/water mixture together with oil, mashed bananas, and vanilla extract. Combine with the dry ingredients and mix until all lumps disappear. Now fold in the chopped dark chocolate.
  4. Pour into loaf pan and bake for about 60 minutes or until a toothpick comes out clean.
Notes
 
  1. I’m a big fan of walnuts, you can also mix in about a cup of walnuts along with the chocolate, making it even more dense and filling! Or you can even omit the chocolate and add in chopped apples and raisins!

Walnut Bread Roll Recipe (Croatian Orahnjaca)

orehnjaca orahnjaca nut roll recipe tijesto christmas traditional croatian better baking bible

A traditional European delicacy, a walnut roll is the ideal recipe for a special occasion or for a every day treat. You can alter this recipe with poppy seeds as well and even add in raisins soaked in rum for an even yummier taste.

Walnut Bread Roll Recipe (Croatian Orahnjaca)


Ingredients:

Dough
 
  1. – 100 grams caster sugar
  2. – 200 ml milk
  3. – 30 grams yeast
  4. – 600 grams plain flour
  5. – 150 grams butter, melted
  6. – 4 egg yolks
  7. – 1/2 tsp salt
Filling
 
  1. – 400 grams wallnuts, finely ground
  2. – 4 egg whites
  3. – 200 grams caster sugar
  4. – 100 ml milk, scalded

Instructions:

  1. Dissolve the sugar in warm milk, blend in the yeast and leave for 15 minutes.
  2. Mix together flour, yeast, salt, butter and egg yolks to make a dough. Beat with a wooden spoon until blisters begin to form on the dough.
  3. Cover and let stand in a warm place until it doubles in size, about 1 hour.

Filling

  1. Beat egg whites until stiff.
  2. Heat the milk in a pot until scalding hot. Pour the scalded milk over the walnuts. Combine with sugar and rum. Allow to cool.
  3. Gently fold in beaten egg whites.

To Assemble

  1. Spread flour on a large table-cloth. Divide the dough into two sections.
  2. Roll each section out very thin (on the table-cloth).
  3. Divide walnut mixture into half and fill each rolled out down with the wallnut filling making sure it’s spread out evenly.
  4. Roll by up by lifting the edge of the table-cloth on which the dough was rolled out, to form an even roll.
  5. Liberal oil 2 bread pans and place a roll into each pan.
  6. Brush the rolls with melted butter and bake at 175 C (350 F) for about 40 minutes or until they become golden. Let cool in the pan. Slice and enjoy.
Notes
 
  1. Add raisins soaked in rum for a hit of taste. Freeze the extra loaf by wrapping in tin foil and sealing in a plastic bag.