Spotlight On: Tasty Imaginations – Edible Printing Ink for Cakes, Cookies, Cupcakes, and More!

Customize your baked treats with edible printing ink and let your imagination run wild!

1 review tasty imaginations order online edible printing system ink icing sheets wafers chocolate cakes cookies themed birthday party cupcakes frozen disney princess

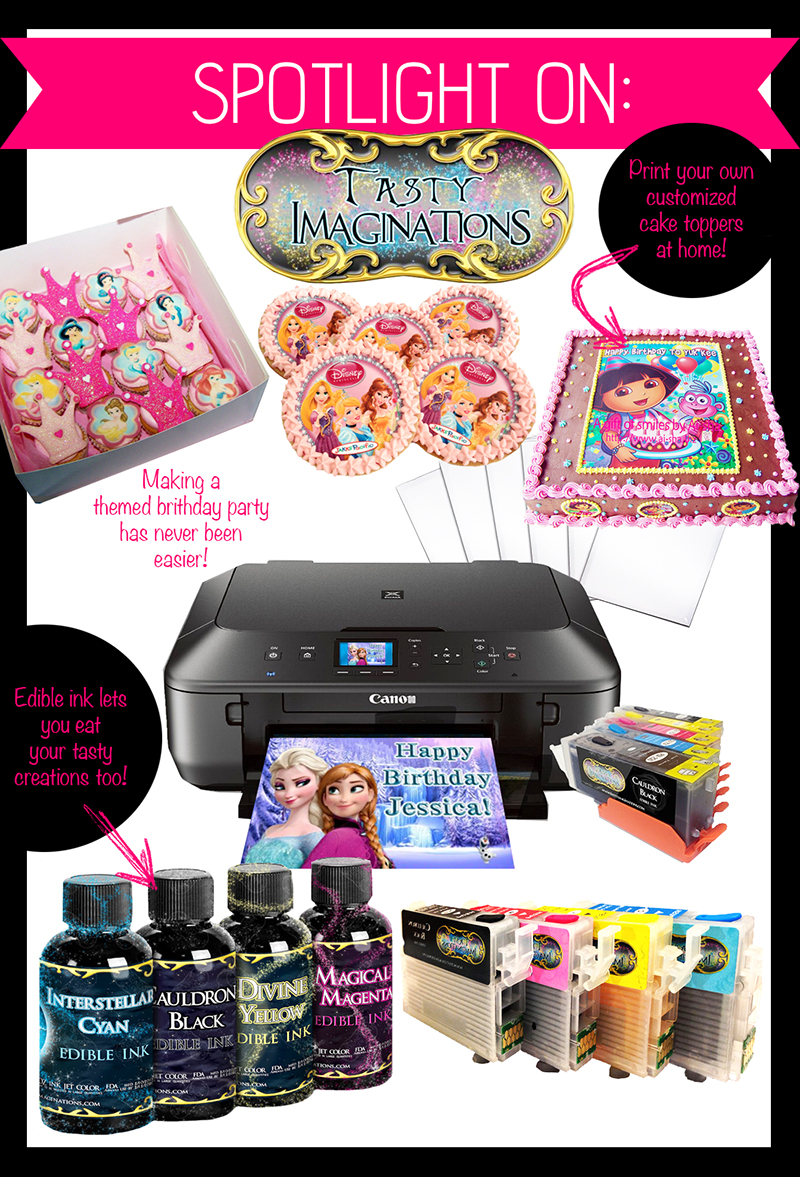
The name Tasty Imaginations says it all – edible printing ink that lets you print just about anything your heart desires for the tops of cupcakes, cakes, cookies, and just about any baked goods. If you’ve ever wanted to print your own customized image for a birthday cake or even make professional looking cookies for a Disney themed party, you can do it all and EASILY with an edible printer and some frosting sheets from Tasty Imaginations. 

I’ve never tried to print my own edible photos simply because I never knew how easy it was to do at home!

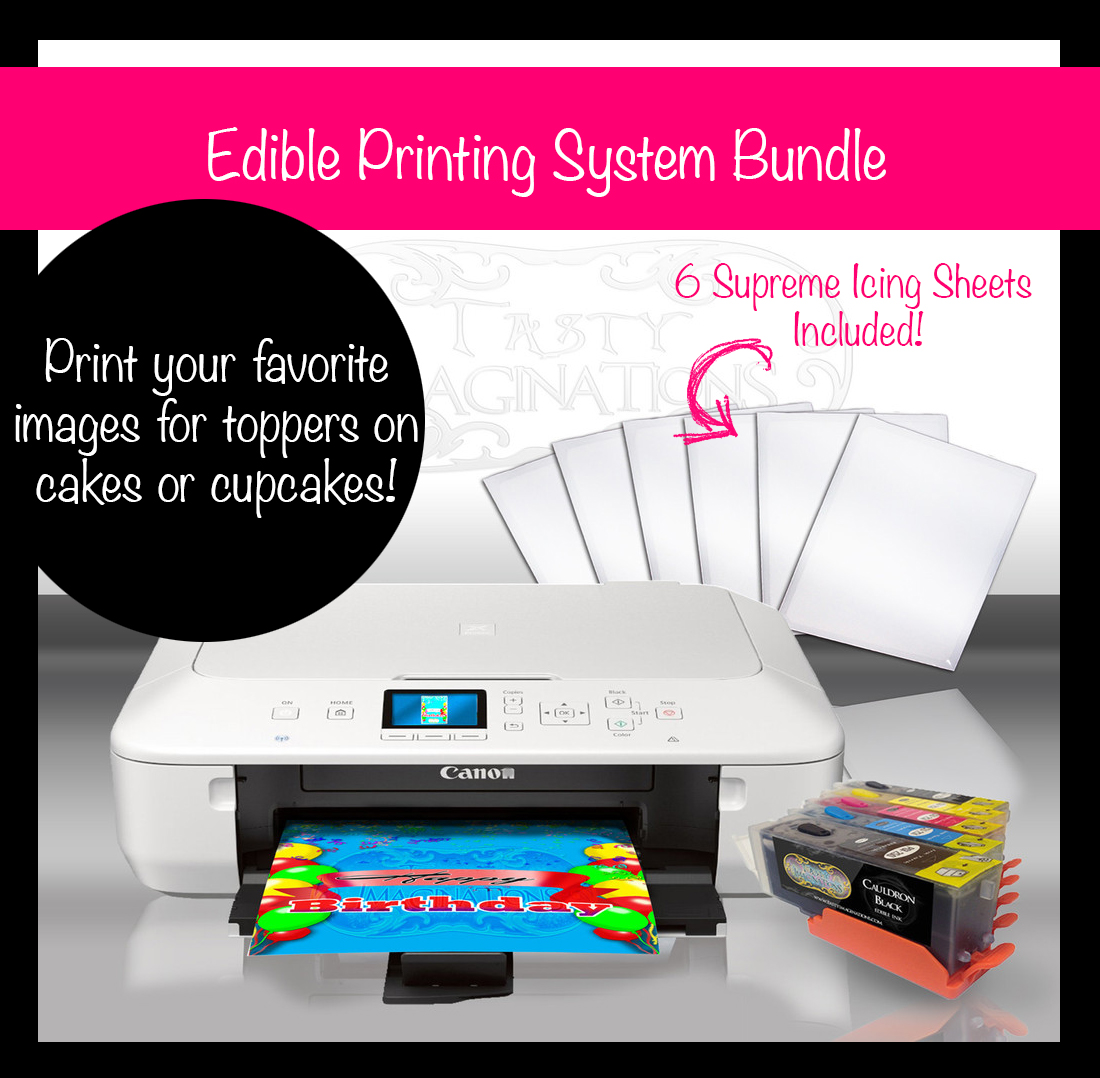
Tasty Imaginations sells affordable edible printers like this Frozen Dreams Edition Canon Printer that comes with 6 supreme icing sheets and a set of edible ink cartridges. It lets you print on frosting sheets, wafer sheets, rice sheets, and even chocolate transfer sheets. I feel like Charlie in the chocolate factory already!

tasty imaginations order online edible printing system canon printer edible ink icing sheets wafers chocolate cakes cupcakes print on cookies how to better baking bible blog review

What I LOVE about Tasty Imaginations is that they supply you with everything you will ever need for edible printing. All of their products are FDA approved and proudly made in the USA! From specialized edible printers, frosting sheets, refillable cartridges, and numerous templates for different seasons and occasions, they truly are with you every step of the way.

If you are a recreational baker, just planning a cool party, or even looking to open up your own catering business, visit Tasty Imaginations to unleash your sugary imagination and start creating baked wonders!

Chocolate Chip Banana Cupcakes With Cream Cheese Topping

chocolate chips banana cupcakes recipe easy birthday cream cheese frosting whipping topping better baking bible blog cake decorating ideas

20130213-IMG_4640 / PHILLIPE LORENZO / CC BY

Chocolate and banana is the perfect foundation for ANY cupcake, cake, or even bread recipe! It’s one of the most favorite flavours of many and mixed in with a cream cheese topping, who can resist? These cupcakes are loaded with chocolate chips and have a banana cream cheese topping to cool you down in the summer months and even cozy you up in the winter! Bake away for family and friends, and you surely won’t disappoint! 

Chocolate Chip Banana Cupcakes with Cream Cheese Frosting

Yields 18
Delicious banana cupcakes with chocolate chips and cream cheese frosting!
 
Ingredients:
 
For Cupcakes
 
  1. Dry Ingredients
  2. 1 ¾ cup flour
  3. 1 cup sugar
  4. 1 tbsp baking powder
  5. ½ tsp salt
  6. 2 tsp vanilla extract or 1 packet vanilla sugar
  7. Wet Ingredients
  8. ½ cup Crisco shortening
  9. 1/3 cup evaporated milk
  10. 2 medium sized ripe bananas, mashed
  11. 2 large eggs
  12. 1 cup chocolate chips
For Cream Cheese Frosting
 
  1. 8 oz (225g) of cream cheese
  2. ½ tsp vanilla extract
  3. ½ cup powdered sugar
  4. 2/3 cup heavy cream, chilled

Instructions:

To Make Cupcakes
 
  1. Set oven to 375F and line cupcake pan with cupcake cups. In a large mixing bowl using an electric mixer, mix together all the dry ingridients. Slowly mix in the wet ingredients one at a time and then mix in the chocolate chips last with a wooden spoon.
  2. Fill cupcake cups with batter and bake for about 20 minutes or until toothpick comes out clean. Remove from oven and allow to cool for 10 minutes. Transfer to a cooling rack until completely cooled.
To Make Frosting
 
  1. In a large mixing bowl using an electric mixer, beat the cream cheese until smooth. Slowly add in the powdered sugar, vanilla extract, and then the heavy cream until super thick. Pipe frosting onto cooled cupcakes and serve! To store, place cupcakes in airtight containers.

Belgian Waffles with Ice Cream, Nutella, Banana, and Strawberries

belgian waffles recipe bananas nutella chocolate how to make waffle iron strawberries drizzled ice cream batter easy original better baking bible blogYUM WAFFLES / SOLOAKEWLSTICK / CC BY, A REAL BELIGIAN WAFFLE / JUSTIN RUMAO / CC BY, WAFFLE HEAVEN / PURRRPL_HAZE / CC BY 

The Belgian Waffle is one of my favorite types of waffles due to its huge size, fancy toppings and unlimited wow factor. If you are looking to surprise or impress someone, the Belgian waffle is the way to go. It’s identified buy it’s larger than average size, light batter, and high grid pattern. It uses yeast to make instead of baking powder. The recipe I’m showing below is straight from Belgium and is one of the few that actually doesn’t use yeast, instead it uses whipped egg whites. 

What’s interesting to know is if you go to Belgium itself, there is no single type of waffle identifies as the ‘Belgian Waffle’ as it does not exist. They have different varieties like the Brussels waffle and the stroopwafel. Try it out and see for yourself!

Belgian Waffles with Ice Cream, Nutella, Banana, and Strawberries

 
Make this delicious desert right at home with all kinds of your favorite unique toppings!
 
Ingredients:
 
Waffle
 
  1.  250g of flour
  2.  Spoonful of sugar
  3.  Pinch of powdered vanilla
  4.  Pinch of salt
  5.  Eight egg yolks
  6.  Half liter of sweetened cream or fresh milk
  7.  250g of butter
  8. Eight egg whites
Toppings
 
  1.  Icing sugar
  2.  Whipped cream
  3.  Nutella
  4.  Ice Cream
  5.  Strawberries, blueberries, raspberries, banana
  6.  Butter, maple syrup, orange marmalade
  7.  Cherries, dark chocolate chips
  8.  Walnuts
Instructions:
 
  1. In a mixing bowl mix flour, sugar, vanilla, salt, and egg yolks
  2. Blend in half a liter of sweetened cream or fresh milk and then melt the 250 grams of butter in a pan
  3. Whip the eight egg whites until they are very stiff
  4. Add the melted butter to the original mixture followed by the whipped egg whites
  5. Lightly grease a waffle iron and heat
  6. Fill one side with a good spoonful of the waffle mix and close the iron
  7. Cook until it has a golden color
  8. Serve with some icing sugar or the topping of your choice

Granny’s Mini Pecan Pie Tarts

healthy grannys mini pecan pie tarts recipe easy better baking bible blog nuts walnuts muffin cups cupcake fall recipe snack butter easyPECAN PIE CLOSE-UP / SEA TURTLE / CC BY , IMG_5886 / ISABELLE / CC BY

Calling all nut lovers – satisfy your sweet tooth this season with you very own homemade pecan pie tarts! You shouldn’t have to settle for only a slice of pecan pie when you can have your very own mini-pecan tarts overloaded with healthy nuts and a gooey mixture of brown sugar, butter, eggs and vanilla. These pecan pie tarts are hands down my favorite dessert and make the perfect treat to toss in a zip-lock bag and take with you on the go. You can even make this recipe in advance and display the tarts on tiered cupcake holders for an elegant presentation and a warm welcome to the upcoming season. If you are looking for a Thanksgiving dessert or a mini gift for x-mas, I would definitely have these tarts at the top of my list. 

Granny’s Mini Pecan Pie Tarts

Yields 12
These mini pecan tarts are easy to make desserts and make great snacks to take to school or to the office!
 
 
Ingredients:
 
For Pie Tarts
 
  1. 2 (3-ounce) packages cream cheese, softened
  2. 2/3 cup unsalted butter, softened
  3. 2 cups all-purpose flour
  4. 1/2 teaspoon salt
  5. 1 cup chopped pecans
For Filling
 
  1. 3 large eggs, beaten
  2. 1 cup firmly packed dark brown sugar
  3. 3/4 cup light corn syrup
  4. 2 tbsp butter, melted
  5. 1 teaspoon vanilla extract

Instructions:

To Make Pie Tarts
 
  1. In a medium bowl, beat together cream cheese and 2/3 cup butter at medium speed. Beat in flour and salt until combined and divide the dough in half. Flatten each half into a circle about 1 inch thick, wrap in plastic wrap and let it chill for 1 hour.
  2. Shape dough into 2-inch balls and flatten them. Place each into in 3-inch muffin cups, forming each into a shell and letting it form a lip above the cups. You can use a fork to press into the edges to make little decorative lines. Sprinkle pecans evenly in pastry cups.
To Make Filling
 
  1. Whisk together eggs, brown sugar, corn syrup, butter, vanilla extract and salt until blended.
  2. Pour mixture evenly over pecans until pastries are full. Bake at 350F for 30-35 minutes or until set.

Tutorial: How to Make Mascarpone Cheese at Home for Cheap! All You Need is Heavy Cream and Lemon Juice!

how to make mascarpone cheese for cheesecakes easy diy cupcake filling recipe better baking bible blog low fatMASCARPONE / DAVID ERICSON / CC BY , CHEESECAKE / FREDERIQUE VOISIN-DEMERY / CC BY , MASCARPONE / STU_SPIVACK / CC BY, CARAMEL / ROSENBEGAL / CC BY

We all know that mascarpone cheese can be expensive, but did you know that there’s a way to make it at home? This budget-friendly recipe is truly a keeper, and you’ll never want to buy mascarpone from the store again! All you need are two basic ingredients to make this delicious cheese. Heavy cream and lemon juice are all you need to put this together, and a little bit of patience. Use your homemade mascarpone with your favorite tiramisu recipe, or simply spread it on a bagel for a tasty breakfast!

Ingredients:

1) Saucepan

2) 2 cups heavy cream (this recipe makes approximately 2 cups of mascarpone cheese)

3) 1 lemon

4) Strainer

5) Unbleached cheese cloth

6) Large bowl

7) Candy thermometer

Steps:

1.) Take out your saucepan, pour in the 2 cups of heavy cream, and stick in your candy thermometer. Bring the cream to a simmer. The temperature on the thermometer should be around 180 F. Keep the temperature around 180 F.

2.) Allow the cream to simmer at 180 F for 3 minutes. Add in lemon juice. Allow it to simmer for an additional 3 minutes, then take the cream off the heat. Leave it to cool until it’s room temperature.

3.) Take out your strainer and line it with 3 layers of cheesecloth. Place a bowl under the strainer. Pour the mascarpone into the strainer.

4.) Place the strainer with the bowl underneath into the fridge. Leave it there overnight. In the morning, your mascarpone will be thick and creamy. The mascarpone will be good in the fridge for 1 week.

The ORIGINAL Marble Cupcakes With Buttercream Frosting – Super Easy!

marble buttercream cupcakes recipe easy birthday ideas chocolate vanilla marble buttercream frosting better baking bible blog

Marble Cupcakes / F_A  / CC BY 

These marble cupcakes really hit the bulls eye topped with creamy vanilla and chocolate buttercream frosting! Marble cake has so many different versions, but we’ve never done it before with marbled icing. This recipe is easy peasy, and you probably already have all the ingredients in your pantry!

The ORIGINAL Marble Cupcakes With Buttercream Frosting – Super Easy!


Ingredients:

For Cupcakes

  1. 2/3 Cups unsalted butter
  2. 2/3 Cups sugar
  3. 3 large eggs
  4. ½ Tsp salt
  5. 1 1/2 Cups flour
  6. 2 Tsp baking powder
  7. 1 Tsp baking soda
  8. 50 ml of milk
  9. 2 Tsp vanilla extract
  10. 3 Tbsp Cocoa Powder
For Chocolate and Vanilla Icing
  1. 1 Cup butter
  2. 450g Philadelphia cream cheese, chopped into chunks
  3. 8 Cups icing sugar
  4. 2 Tbsp milk
  5. 60g Cocoa powder
  6. 1 Tsp vanilla extract

Instructions:

To Make Cupcakes
 
  1. Preheat oven to 356F and line cupcake tray with cupcake cups. Using an electric mixer, whip butter and sugar until light and fluffy.
  2. Mix in eggs, milk, and vanilla extract. Slowly mix in flour, salt, baking powder, and baking soda until well combined.
  3. Place half of the mixture in another bowl and add the cocoa powder to one of the bowls.
  4. Spoon a bit of the vanilla and a bit of the chocolate batter into your cupcake cups and use a knife to carefully wiggle through your cupcake. Bake for about 20 minutes.
To Make Icing
 
  1. Using an electric mixer, whip butter until light and fluffy. Slowly add in cream cheese chunks and whip just until combined, being careful to not over-mix.
  2. Slowly add in icing sugar and milk. Divide icing into two bowls and in one add the vanilla extract and in the other add the cocoa powder. Now add vanilla extract or Cocoa powder and mix until well combined.
  3. Place icing into a piping bag and pipe your cupcakes!

Chocolate Ice Cream Oreo Pecan Mud Pie

cookie pecan mud pie recipe coffee mocha whipping cream easy dessert ideas summerMud Pie / Spider.Dog / CC BY

Love ice cream on a hot summer day? This chocolate Oreo cookie pecan mud pie is infused with flavour and dripping with yumminess. With a hint of coffee ice cream and garnished with whipping cream and even MORE Oreos and pecans, it’s really a delicious treat the whole family would love. It also makes a cool frozen dessert that’s so simple to make, it doesn’t even require much baking!  

Chocolate Cookie Pecan Mud Pie


Ingredients:

  1. 13 Oreo cookies, crumbled
  2. 3 tbsp unsalted buter, melted
  3. 1 egg white, lightly beaten
  4. 1-1/4 cups pecans, chopped and toasted
  5. 1/4 cup sugar
  6. 2 cups coffee ice cream
  7. 2 cups chocolate ice cream
  8. 13 Oreo cookies, chopped and divided (leave some for decorating the top!)
  9. Frozen whipping cream for decorating
Instructions:
 
  1. Preheat oven to 350 F. In a large bowl, mix together Oreos and butter and press into a 9″ pie plate. Brush the top of the Oreos with the egg white and place in the oven for about 5 minutes.
  2. Combine both ice creams and 1 cup of chopped Oreos and 1 cup of pecans. Dump mixture into crust and freeze for 10-15 minutes. Using the remaining cookies and pecans, sprinkle onto top of pie and press (Leave a bit to decorate the top!). Freeze pie for at least 7-10 hours.
  3. To decorate, swirl whipping cream over the whole pie and sprinkle chopped Oreos and pecans.
Notes
 
  1. To toast pecans, place in the oven on a cookie sheet for about 10 minutes.